

INSTRUMENT DIMENSIONS & MOUNTINGS
• Install the gauges on the dashboard so that they can be easily operated and checked from the operator’s seat. Those gauges should be free from splash of water when installed.
• Before removing or installing electric parts, turn OFF the main switch and remove the battery cables from the battery. When disconnecting the battery cable, remove the negative cable first and then the positive cable. When connecting the cable, connect the positive cable first and then the negative cable.
SPACING OF INSTRUMENTS
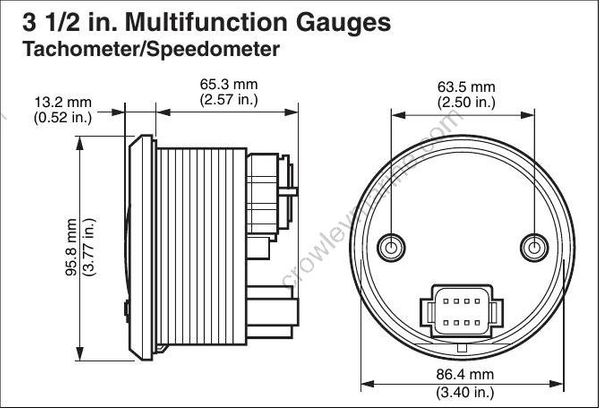
For proper panel clearances please observe these minimum center to center distance specifications when installing gauges.
- 97 mm (3 13/16 in.) center to center for 3 1/2 in. instruments
- 83 mm (3 1/4 in.) center to center for 3 1/2 in. instruments to 2 in. instruments
- 67 mm (2 5/8 in.) center to center for 2 in. instruments
HOLE SIZES
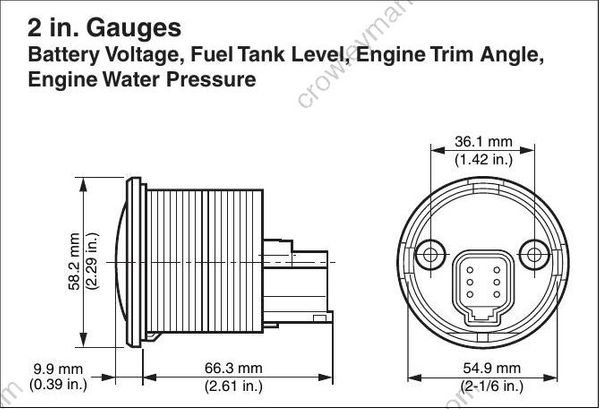
Check area behind panel to be sure there is adequate clearance for installing instruments and wires and to make sure that other components will not be contacted when cutting holes.
3 1/2 in. Multifunction Gauge
Installation, 3 1/2 in. Gauge:
- Panel cut-out, 86 mm (3 3/8 in.) hole saw
- Gauge mounting, nut
2 in. Gauge
Installation, 2 in. Gauge:
- Panel cut-out, 52 mm (2 1/16 in.) hole saw
- Gauge mounting, nut