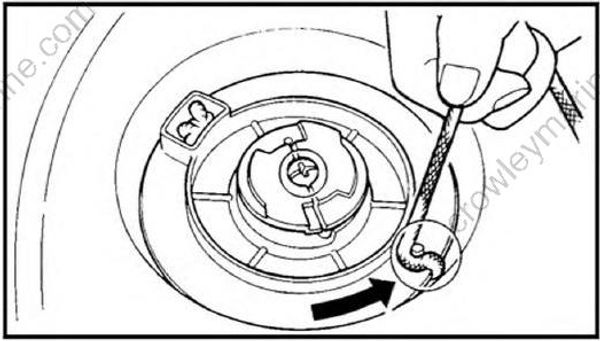
EXPLODED DIAGRAM
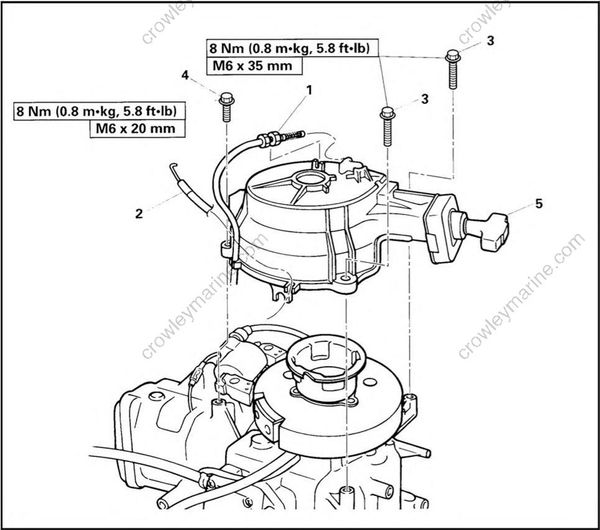
REMOVAL AND INSTALLATION CHART
| Step | Procedure/Part name | Q'ty | Service points |
|---|---|---|---|
| RECOIL STARTER REMOVAL | Follow the left "Step" for removal. | ||
| 1 | Start-in-gear protection cable | 1 | |
| 2 | Choke wire | 1 | |
| 3 | Bolt with washer (recoil starter) | 2 | |
| 4 | Bolt with washer (recoil starter) | 1 | |
| 5 | Recoil starter ass'y | 1 | |
| Reverse the removal steps for installation. |
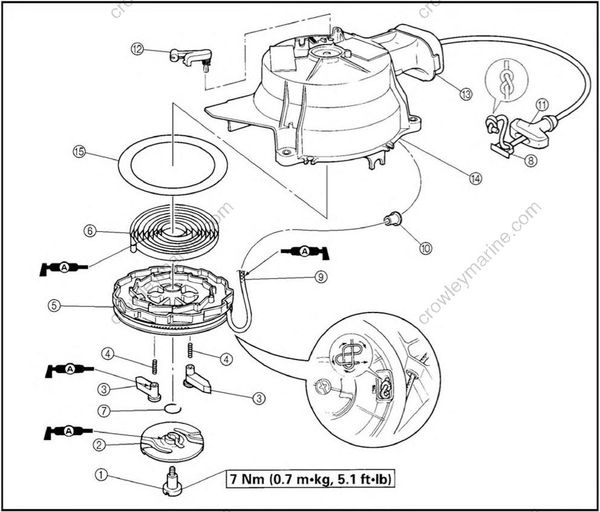
| Step | Procedure/Part name | Q'ty | Service points |
|---|---|---|---|
| RECOIL STARTER DISASSEMBLY | Follow the left "Step" for disassembly. | ||
| (1) | Screw (drive plate) | 1 | |
| (2) | Drive plate | 1 | |
| (3) | Drive pawl | 2 | |
| (4) | Pawl springs | 2 | |
| (5) | Sheave drum | 1 | |
| (6) | Spiral spring | 1 | |
| (7) | Clip (drive plate) | 1 | |
| (8) | Plate (starter handle) | 1 | |
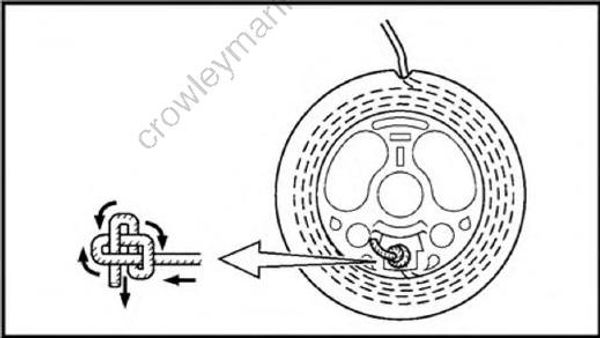
| (9) | Starter rope | 1 | NOTE: |
| Apply grease and make sure to reef knot both ends, after installation. |
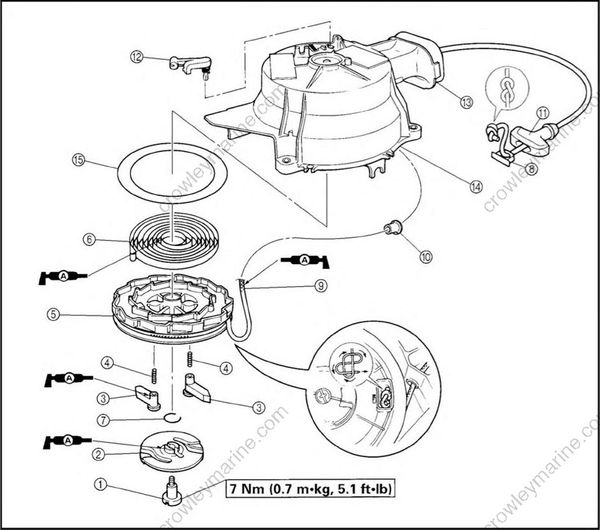
| Step | Procedure/Part name | Q'ty | Service points |
|---|---|---|---|
| (10) | Collar | 1 | |
| (11) | Starter handle | 1 | |
| (12) | Start-in-protection lever | 1 | |
| (13) | Rubber seal | 1 | |
| (14) | Starter case | 1 | |
| (15) | Plate | 1 | |
| Reverse the disassembly steps for assembly. |
SERVICE POINTS
Sheave drum removal
WARNING:
Wear proper safety goggle and gloves to protect your eyes and hands Because: the spiral springs may jump out causing injury.
- Rotate:
- Sheave drum
Turn the sheave drum clockwise until the spring is free.
NOTE:
- Turn the sheave drum so that the cutaway on the outer surface of the sheave drum faces toward the starter handle.
- Pass the starter rope through the cut.
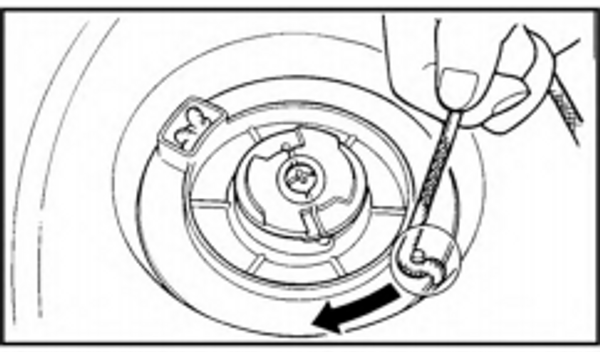
- Remove:
- Bolt
- Drive plate (1)
- Drive pawl (2)
- Sheave drum (3)
WARNING:
Be sure to check that the spiral spring is completely free to prevent it shooting out at you. Then pull the sheave drum carefully upward.
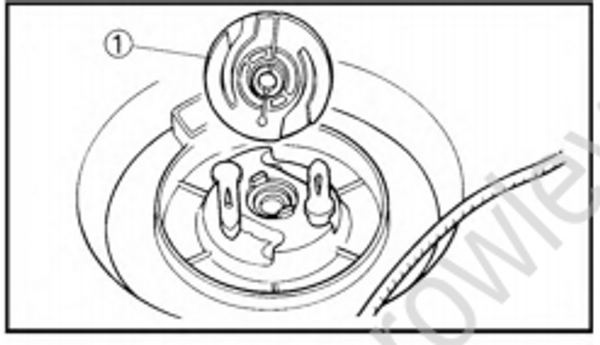
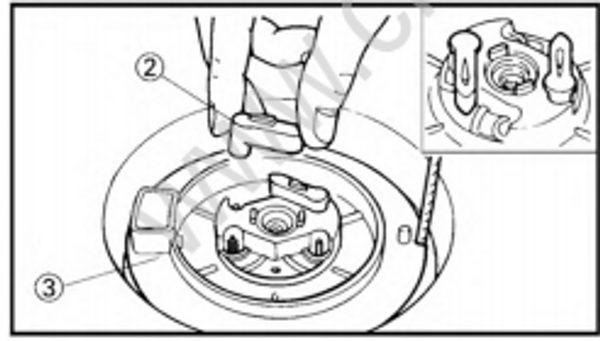
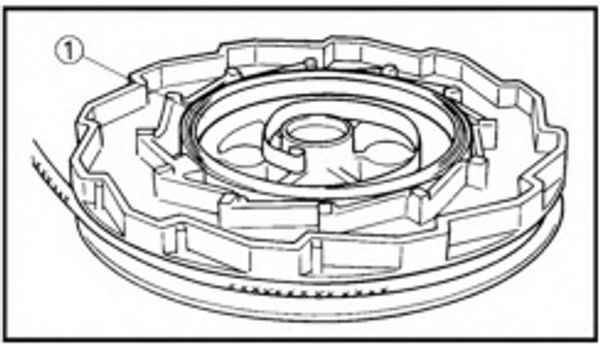
Spiral spring removal
- Remove:
- Spiral spring (1)
WARNING:
Be careful so that the spiral spring does not pop-out when removing it. Remove it by allowing it out one turn of the winding each time.
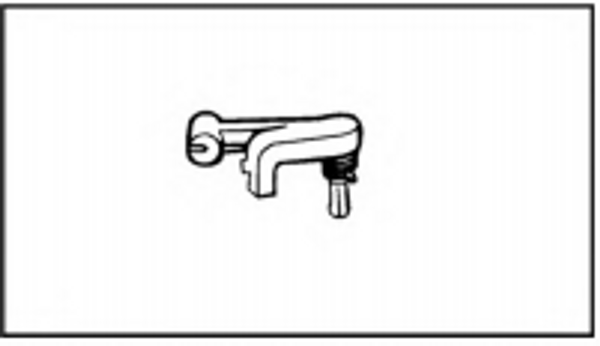
Start-in-gear protection lever inspection
- Inspect:
- Start-in-gear protection lever
Crack/wear/damage -> Replace.
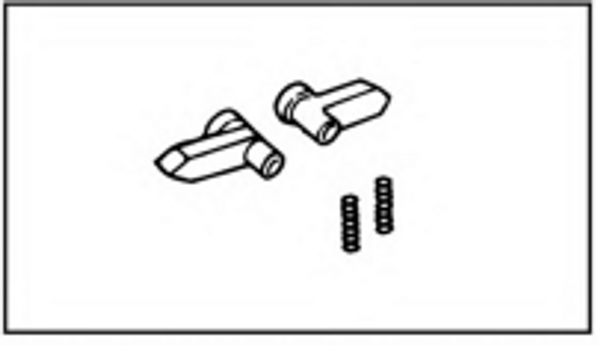
Drive pawl and spring inspection
- Inspect:
Drive pawl
Crack/wear/damage -> Replace.Drive pawl springs
Broken/bent/damage —> Replace.
Sheave drum inspection
- Inspect:
- Sheave drum
Crack/wear/damage -> Replace.
Spiral spring inspection
- Inspect:
- Spiral spring
Broken/bent/damage —> Replace.
Starter rope inspection
- Inspect:
- Starter rope
Fray/wear/damage -> Replace.
NOTE:
When replacing the rope, cut it the specified length and burn the rope end so that it will not trouble.
Apply water resistant grease sufficiently on the new starter rope.
Starter rope length: 1,800 mm (70.9 in)
Starter rope installation
- Install:
- Starter rope
NOTE:
Insert the rope through the rope holes and knot the end.
Wind the rope 2-1/2 turns around the sheave drum.
Place the rope at the cutaway.
Sheave drum installation
- Install:
Sheave drum
Spiral spring
WARNING:
When installing the spiral spring in the sheave drum, take care to ensure that the spiral spring does not pop out and compress it by winding one turn from outside.
NOTE:
Position the outer end of the spiral spring on the retainer post of the sheave drum.
Spiral spring setting
- Set:
- Spiral spring
NOTE:
Wind up the spring 2-1/2 turns counterclockwise with the starter rope.
Recoil starter checking
- Check:
- Starter operation
Rough operation -> Repair.
NOTE:
When checking the recoil starter only, move out the start-in-gear protection lock.
Adjust the start-in-gear protection wire, after install the recoil starter ass'y to the power unit. Refer to page 3-5.