

MOTOR INSTALLATION
Do not overpower your boat. Never install an outboard motor with horsepower exceeding the manufacturer’s recommended maximum horsepower (listed on
the boat “Certification Plate”). Excessive horsepower will have an
adverse effect on hull safety and may cause operating/handling difficulties.
The boat may also sustain stress and hull damage. It is against federal regulations for any marine dealer to service a motor that exceeds the recommended maximum horsepower for your boat. Contact your authorized Suzuki Marine
Dealer if you are unable to locate the hull “Certification Plate”.
TILLER HANDLE MODEL
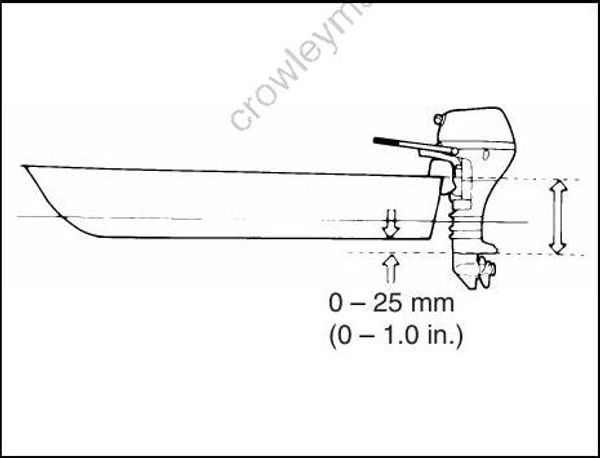
Proper transom height is important for good performance. A motor mounted on a transom that is too high causes the propeller to slip resulting in wasted power or overheating.
A motor mounted on a transom that is too low will increase drag, causing reduced speed.
Make sure that when the motor is lowered all the way down, the anti-cavitation plate is located 0 – 25 mm (0 – 1.0 in.) below the bot tom of the boat (See illustration below).
If anti-cavitation plate is above the water surface, this may induce overheating and the outboard motor will sustain damage.
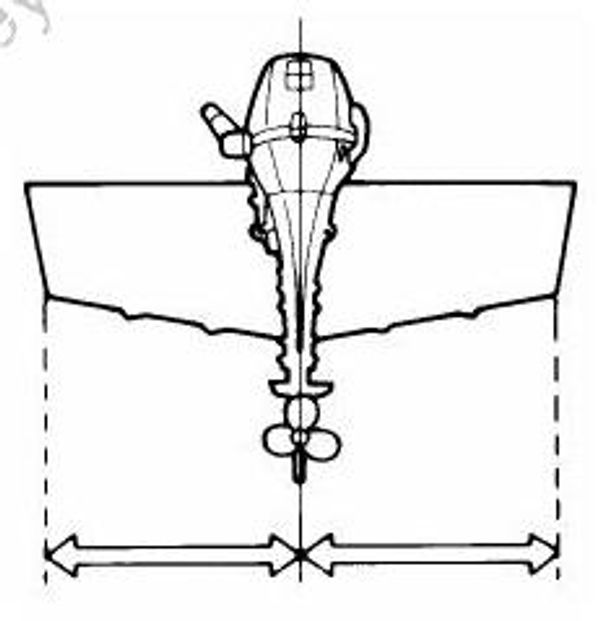
Center the motor on the transom and secure it by alternately tightening the clamp bracket screws by hand. Make sure you accurately cen ter the motor, or the boat will pull to one side during operation.
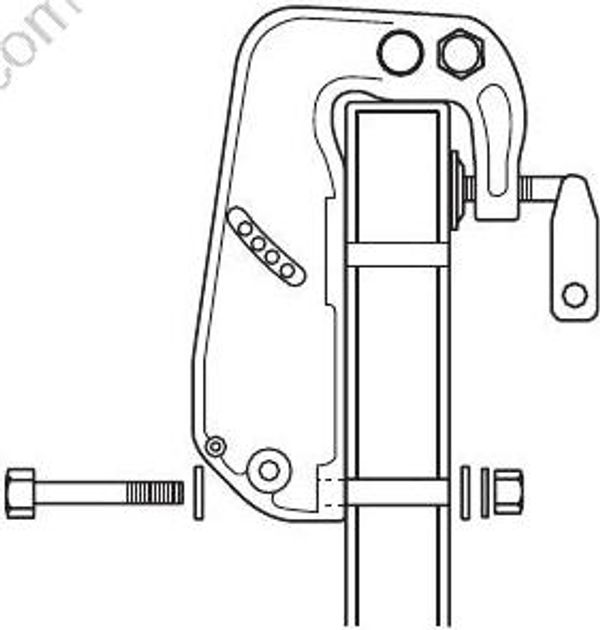
Install 10 mm bolts, washers, lock washers and nuts, as illustrated and tighten the bolts sequentially. Be sure to seal the holes to prevent water leakage.
After installing the motor, check to make sure that steering and tilt movement are not obstructed by any part of the boat. Also make sure that the battery cable (if provided) doesn’t interfere with movement of the motor.
Be sure to bolt the motor to the transom. The motor may come off if it is held only by the clamp screws. Occasionally check the clamp screws for tightness
If you do not have mechanical experience or are not sure of where to drill holes in the boat’s transom, you should have your motor mounted by your authorized Suzuki Marine Dealer
REMOTE CONTROL MODEL
Suzuki strongly recommends that you have your outboard motor, controls and gauges
installed by your authorized Suzuki Marine Dealer. He has the tools, the facilities and the know-how.
Failure to have your outboard motor and associated controls and gauges properly installed can result in personal injury or damage.
BATTERY INSTALLATION
BATTERY INSTALLATION
Suzuki recommends use of a high quality battery for this engine, meeting these minimum requirements:
| TYPE | MARINE |
|---|---|
| COLD CRANK AMPS (CCA) | 274 Amperes or over |
| RESERVE CAPACITY (RC) | 52-minutes or over |
| AMP HOUR | 12 Volt, 35 AH or over |
Secure the battery in a dry area of the boat, away from vibration.
To hook up the battery, first connect the red lead from the motor to the positive battery terminal, then connect the black lead to the negative battery terminal.
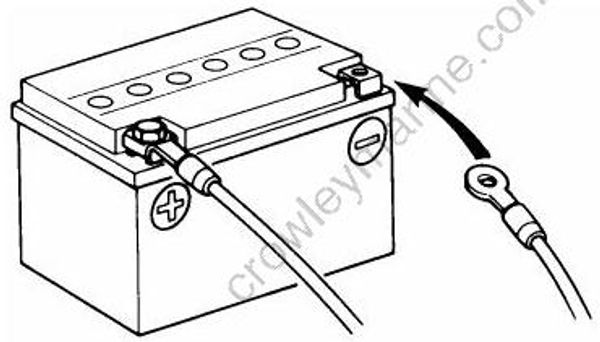
To remove the battery, first disconnect the black lead from the negative terminal, then disconnect the red lead from the positive terminal.
Connecting and disconnecting the battery as described above will help minimize the chance of creating an accidental short circuit and sparks.