

TRIM ANGLE ADJUSTMENT
To help maintain steering stability and good performance, always maintain the proper trim angle as shown in the illustration. The appropriate trim angle varies depending on the combination of the boat, engine, and propeller, as well as operating conditions.
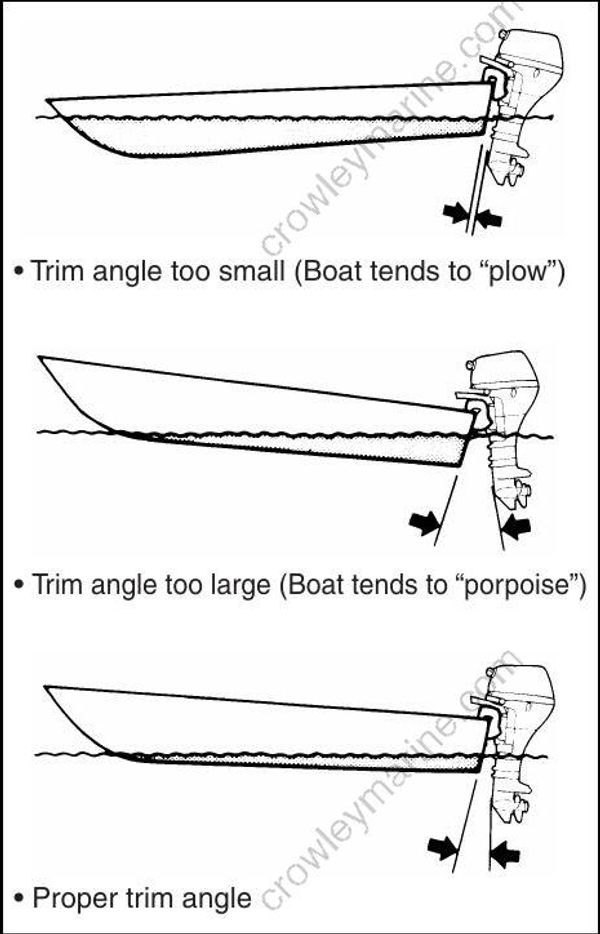
DF25A/25AR
Make a test run in the boat to determine if the trim angle needs to be adjusted.
To adjust the trim angle:
Lock the motor in the fully tilted up position.
(Refer to TILT UP LOCK ARM section.)Reposition the tilt pin (A) in the desired holes.
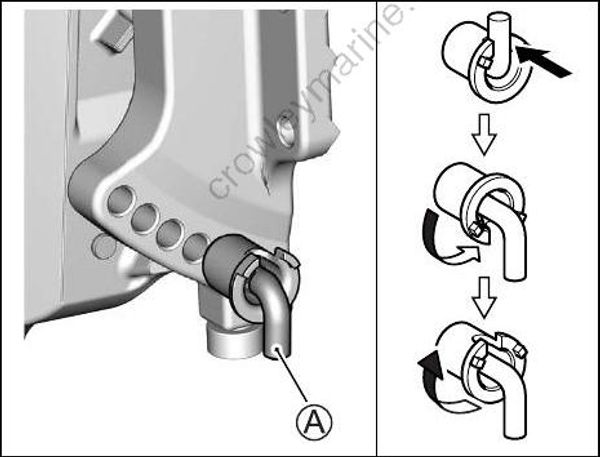
- Lower the motor back down.
To lower the bow, move the pin towards the boat. To raise the bow, move the pin away from the boat.
After you have made an adjustment to the trim angle, make another test run to make sure you have adjusted it to the correct angle.
DF25AQ
Make a test run in the boat to determine if the trim angle needs to be adjusted.
To adjust the trim angle:
- Lock the motor in the fully tilted up position.
(Refer to TILT LOCK LEVER section.)
- Loosen the nuts (B) securing tilt pin (A).
Reposition the tilt pin (A) in the desired holes, then tighten the nuts securely.
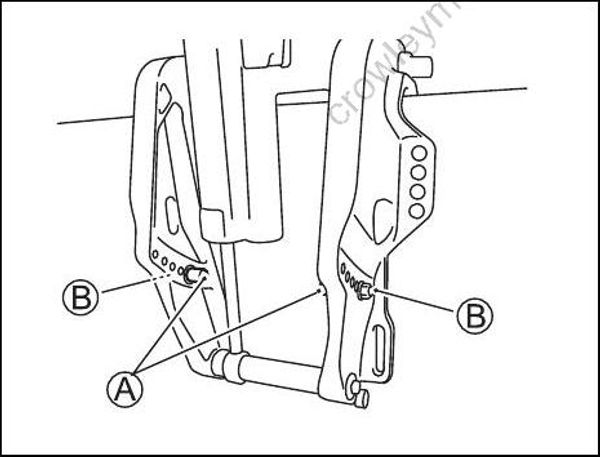
- Lower the motor back down.
To lower the bow, move the pin towards the boat. To raise the bow, move the pin away from the boat.
After you have made an adjustment to the trim angle, make another test run to make sure you have adjusted it to the correct angle.
Trim angle greatly affects steering stability. If the trim angle is too small, the boat may “plow” or “bow steer”. If the trim angle is too large, the boat may “chine walk” from side to side or “porpoise” up and down. These conditions, which result in loss of steering control, can cause occupants to be thrown overboard.
Always maintain proper trim angle based on the combination of your boat, engine, and propeller, as well as operating conditions.
If you operate the motor with the tilt pin removed, you may not be able to control steering as expected.
Do not operate the motor with the tilt pin removed.
DF25AT/25ATH/30AT/30ATH
Make a test run in the boat to determine if the trim angle needs to be adjusted. Adjust the trim angle using the Power Trim and Tilt system. Refer to the POWER TRIM AND TILT section.
If you still cannot achieve good performance, there may be a problem with engine mounting height. Consult your dealer for assistance.
Trim angle greatly affects steering stability. If the trim angle is too small, the boat may “plow” or “bow steer”. If the trim angle is too large, the boat may “chine walk” from side to side or “porpoise” up and down. These conditions, which result in loss of steering control, can cause occupants to be thrown overboard.
Always maintain proper trim angle based on the combination of your boat, engine, and propeller, as well as operating conditions.
If you operate the boat with the motor trimmed beyond the maximum trim position, the water intake holes may be above the water line, causing severe engine damage due to overheating. Never operate the boat with the motor trimmed beyond the maximum trim position.
TRIM TAB ADJUSTMENT
This adjustment is used to compensate for the possible tendency of your boat to veer slightly to port or starboard. This tendency could be due to such things as propeller torque, motor mounting position, etc.
To adjust the trim tab:
- Loosen the bolt (A) that holds the trim tab in place.
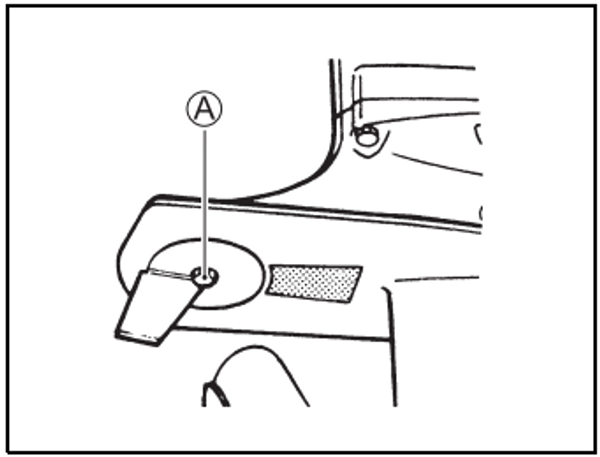
- If the boat tends to veer to port, move the rear end of the trim tab toward the port side.
If the boat tends to veer to starboard, move the starboard side.
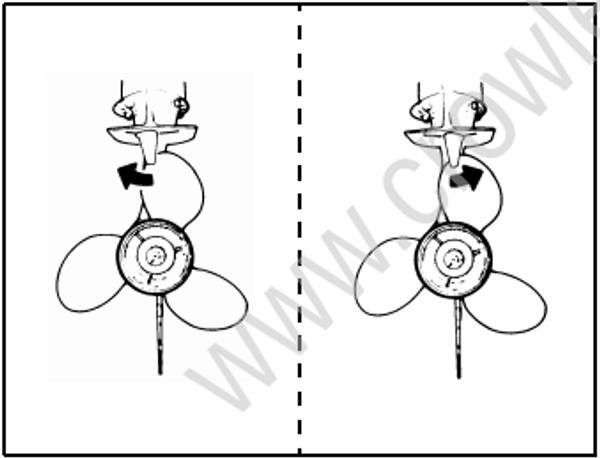
- Tighten the bolt that holds the trim tab in place.
After adjusting the trim tab, check to see if the boat still tends to veer to one side. If necessary, readjust the trim tab.
STEERING TENSION ADJUSTMENT
The steering on your outboard motor should be smooth and not too tight. Adjust the steering tension so that there is only a slight resistance to steering movement.
TILLER HANDLE MODEL
To increase the steering tension, move the lever (A) to the left. To decrease the steering tension, move the lever to the right.
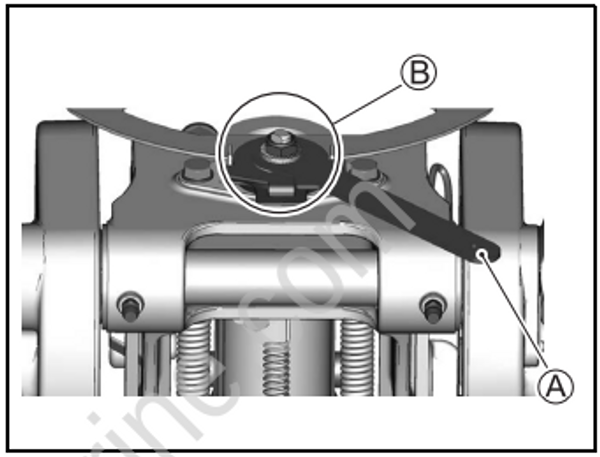
Do not apply a grease to the area (B).
THROTTLE TENSION ADJUSTMENT
TILLER HANDLE MODEL
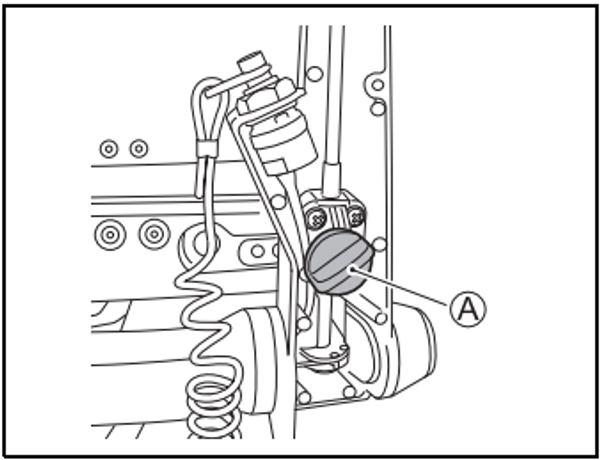
The tension of the throttle control grip can be adjusted according to your preference. To increase the tension, turn the throttle tension adjuster (A) clockwise. To decrease the tension, turn the adjuster counterclockwise.
REMOTE CONTROL MODEL
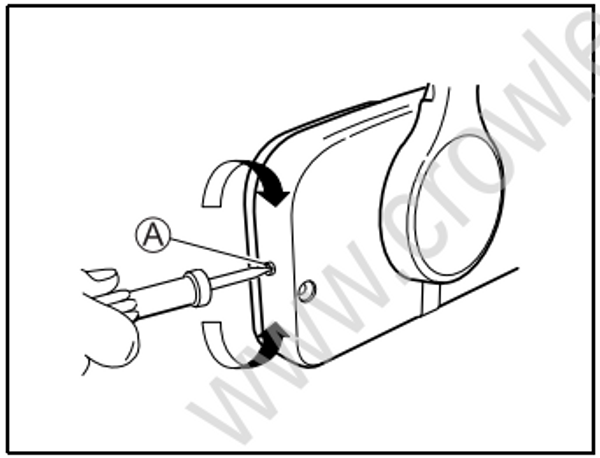
The tension of the remote control handle can be adjusted according to your preference. To increase the tension, turn the throttle tension adjuster (A) clockwise. To decrease the tension, turn the adjuster counterclockwise.
IDLE SPEED ADJUSTMENT
The idle speed has been factory adjusted between 800 – 900 r/min. in neutral.
If idle speed cannot be set within the specified range, contact your authorized Suzuki Marine Dealer.
CAUTION SYSTEM
The caution systems are designed to alert you to certain situations which may cause damage to your outboard motor.
Your outboard motor may become damaged if you rely on the Caution System to alert you to any malfunction that may
occur or to give you an indication of the need for maintenance.
To avoid damage to your outboard motor, regularly inspect and maintain it.
Continuing to operate your outboard motor with the Caution System activated can result in severe damage to your outboard motor.
If the Caution System activates while you are operating your outboard motor, stop the motor as soon as possible and correct the problem or consult your authorized Suzuki marine dealer for assistance.
CAUTION LAMP CHECK
TILLER HANDLE MODEL
Each time the starter system is operated, the three caution lamps – the TEMP 1, the OIL 2 and the CHECK ENGINE 3 will light briefly for the first two seconds, regardless of the motor condition.