PROPELLER INSTALLATION
• When installing or removing the propeller, shift into “Neutral” and remove the emergency stop switch lock plate so that the motor cannot be started accidentally.
• To protect hands, wear gloves and “Lock” the propeller by placing a block of wood between the blades and the anti-cavitation plate.
To install a propeller on your outboard motor, use the following procedure:

Coat the propeller shaft splines (1) liberally with Suzuki water resistant grease to help prevent corrosion.
Place the stopper (2) on the shaft.
Align the propeller (3) with the propeller shaft splines and slide the propeller onto the shaft.
Place the spacer (4) and washer (5) on the shaft.
Install the propeller nut 6 and tighten it with a torque wrench to 50 – 60 N•m (5.0 – 6.0 kg•m/36.0 – 43.5 lb•ft).
Align the grooves in the propeller nut with the hole in the shaft, then insert the cotter pin 7 and bend the pin ends over to lock it in place.
To remove the propeller, reverse the above procedure.
ADJUSTMENTS
TRIM ANGLE ADJUSTMENT
To help maintain steering stability and good performance, always maintain the proper trim angle as shown in the illustration. The appropriate trim angle varies depending on the combination of the boat, engine, and propeller, as well as operating conditions.
Make a test run in the boat to determine if the trim angle needs to be adjusted. Adjust the trim angle using the Power Trim and Tilt system. Refer to the POWER TRIM AND TILT section. If you still cannot achieve good performance, there may be a problem with engine mounting height. Consult your dealer for assistance.
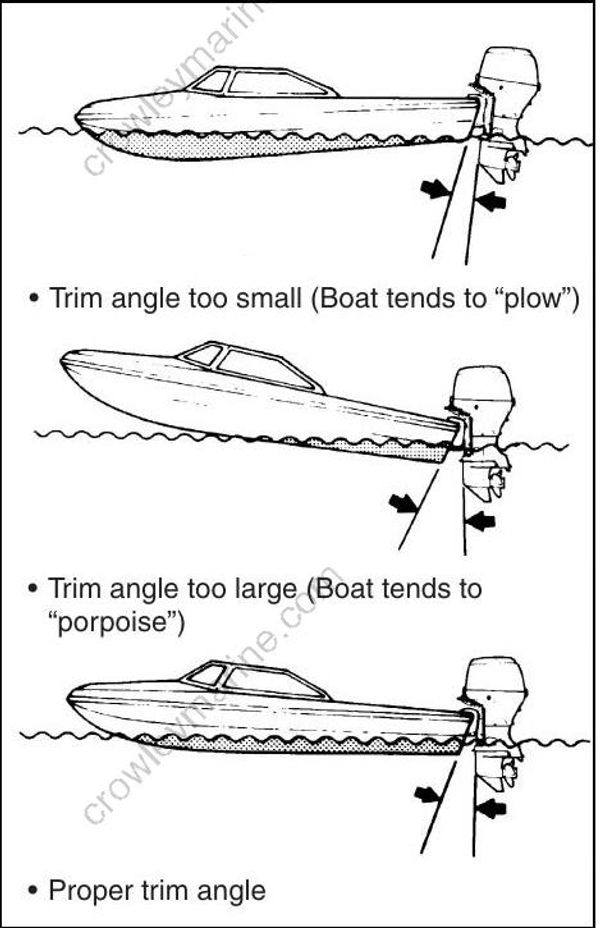
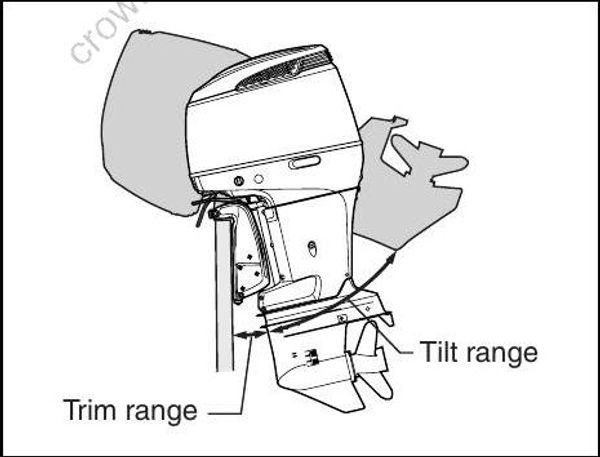
• If the trim angle is too small, the boat may “plow” or “bow steer”, causing instability. If the trim angle is too large, steering control may be lost, the boat may “chine walk” from side to side or “porpoise” up and down, all of which may cause occupants to be thrown overboard.
• Do not operate the engine above 1500 r/min or operate the boat in a planing attitude with the engine beyond the maximum trim position (in other words, in a tilt position). In a tilt position, the swivel bracket will not have side support from the clamp bracket, and the tilt system will be unable to cushion the engine if the lower unit strikes an obstruction. This could lead to occupant injury. In addition, beyond the maximum trim position, the water intake holes may be above the water line, resulting in severe engine damage from overheating.
TRIM TAB ADJUSTMENT
This adjustment is used to compensate for the possible tendency of your boat to veer slightly to port or starboard. This tendency could be due to such things as propeller torque, motor mounting position, etc. To adjust the trim tab:
- Loosen the bolt (A) that holds the trim tab in place.
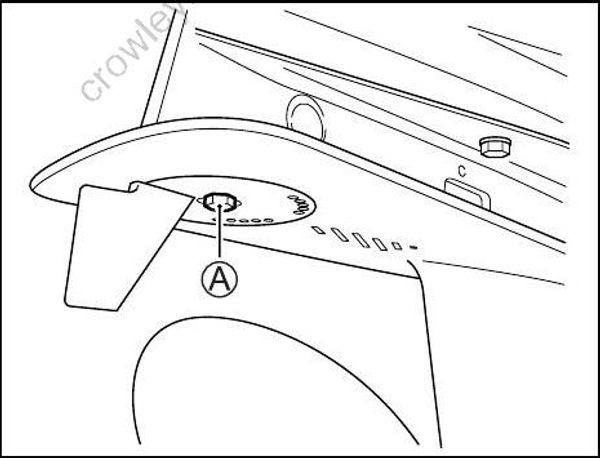
- If the boat tends to veer to port, move the rear end of the trim tab toward the port side. If the boat tends to veer to starboard, move the rear end of the trim tab toward the star board side.
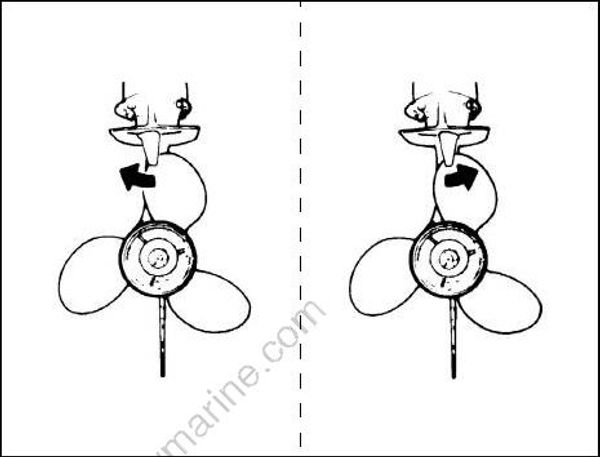
- Tighten the bolt that holds the trim tab in place.
After adjusting the trim tab, check to see if the boat still tends to veer to one side. If necessary, readjust the trim tab.
THROTTLE TENSION ADJUSTMENT
The tension of the remote control handle can be adjusted according to your preference. To increase the tension, turn the adjuster A clock wise. To decrease the tension, turn the adjuster counterclockwise.
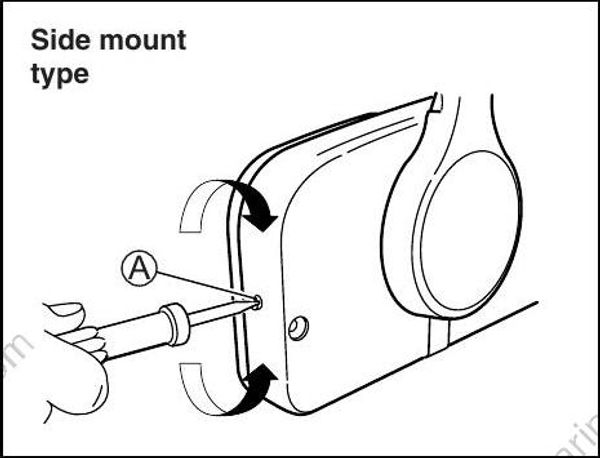
Top mount type
When adjusting the tension of the remote control handle, consult your authorized Suzuki
Marine Dealer.
IDLE SPEED ADJUSTMENT
The idle speed has been factory adjusted between 600 – 700 r/min. in neutral.
If idle speed cannot be set within the specified range, contact your authorized Suzuki Marine Dealer
MOTOR COVER FASTENING ADJUSTMENT
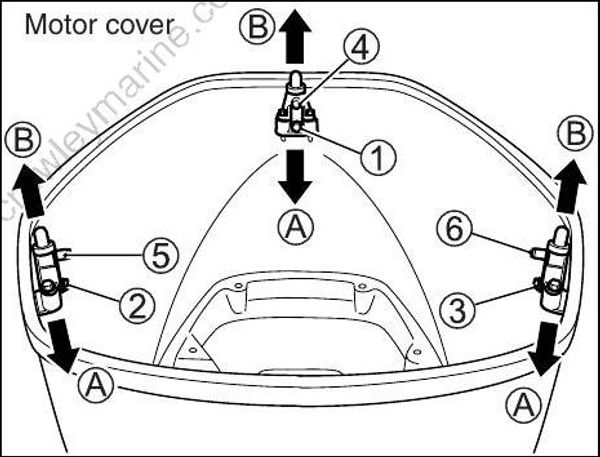
If you feel motor cover fastening is loose or too tight when locking the levers, adjust as follows:
Loosen the bolts (1), (2) and (3).
Adjust the position of brackets (4), (5) and (6). To increase the fastening, move the brackets to the direction (A). To decrease the fastening, move the brackets to the direction (B).
Tighten the bolts.