

MOTOR INSTALLATION
EMISSION-RELATED INSTALLATION INSTRUCTIONS
Fuel lines and fuel tanks used for a vessel must meet the requirements of federal law (40 CFR 1045.112 and 40 CFR 1060).
If you install the engine in a way that makes the engine’s emission control information label hard to read during normal engine maintenance, you must place a duplicate label on the vessel, as described in 40 CFR 1068.105.
Failing to follow these instructions when installing a certified engine in a vessel violates federal law (40 CFR 1068.105(b)), subject to fines or other penalties as described in the Clean Air Act.
MOTOR INSTALLATION
Overpowering your boat can be hazardous. Excessive horsepower will have an adverse effect on hull safety and may cause operating/handling difficulties. The boat may also sustain stress and hull damage.
Never install an outboard motor with horsepower exceeding the manufacturer’s recommended maximum horsepower listed on the boat’s “Certification Plate”. Contact your authorized Suzuki marine dealer if you are unable to locate the hull “Certificate Plate”.
It is against federal regulations for any marine dealer to service a motor that exceeds the recommended maximum horsepower for your boat.
TILLER HANDLE MODEL
Proper transom height is important for good performance. A motor mounted on a transom that is too high causes the propeller to slip resulting in wasted power or overheating. A motor mounted on a transom that is too low
will increase drag, causing reduced speed.
Make sure that when the motor is lowered all the way down, the anti-cavitation plate is located 0 – 25 mm (0 – 1.0 in.) below the bottom of the boat (See illustration below).
Operating your outboard motor with the anti-cavitation plate above water can cause overheating and severe damage to your outboard motor.
Do not operate your outboard motor with the anti-cavitation plate above water.

Center the motor on the transom and secure it by alternately tightening the clamp bracket screws by hand. Make sure you accurately center the motor, or the boat will pull to one side during operation.
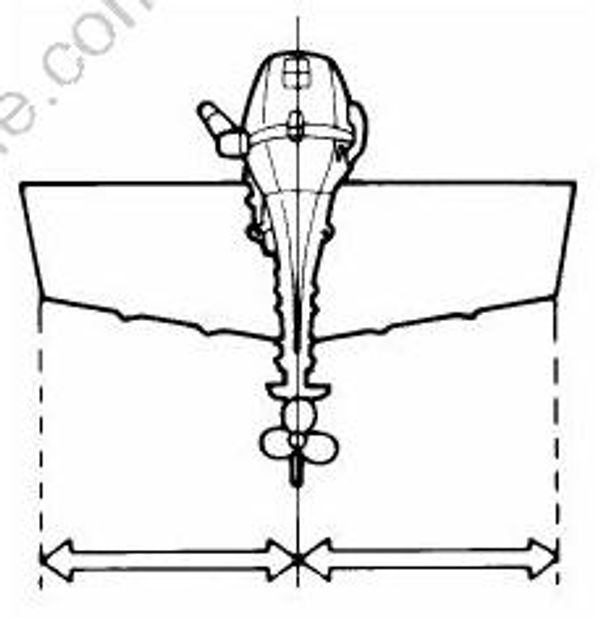
Install 8 mm bolts, washers, lock washers and nuts, as illustrated and tighten the bolts sequentially. Be sure to seal the holes with sealant to prevent water leakage.
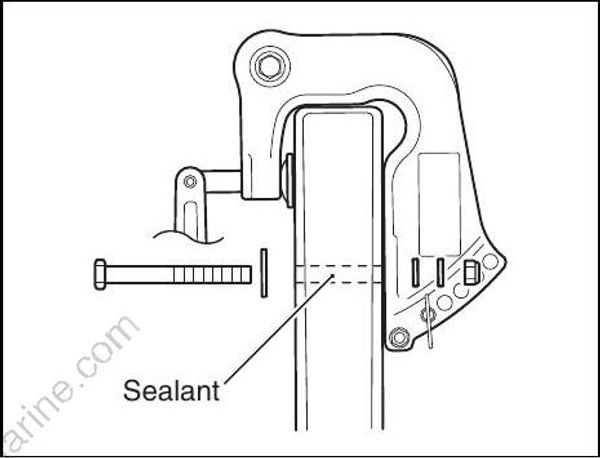
After installing the motor, check to make sure that steering and tilt movement are not obstructed by any part of the boat. Also make sure that the battery cable (if applicable) doesn’t interfere with movement of the motor.
If the motor is not properly secured to the transom, it can come off. Be sure to bolt the motor to the transom. The motor may come off if it is held only by the clamp screws. Occasionally check the clamp screws for tightness.
If you attempt to mount the outboard to the transom without having mechanical experience or without being certain where to drill holes, you can seriously damage the boat. If you do not have mechanical experience or are not sure of where to drill holes in the boat’s transom, you should have your motor mounted by your authorized Suzuki marine dealer.
REMOTE CONTROL MODEL
Suzuki strongly recommends that you have your outboard motor, controls and gauges installed by your authorized Suzuki Marine Dealer. He has the tools, the facilities and the know-how.
Failure to have your outboard motor and associated controls and gauges properly installed can result in personal injury or damage.
Suzuki strongly recommends that you have your outboard motor, controls and gauges installed by your authorized Suzuki marine dealer. He has the tools, the facilities, and the know-how to do the job correctly.