

Step 1: Inspection And Maintenance
If fishing line wraps around the rotating propeller shaft, the propeller shaft oil seal can become damaged and can allow water to enter the gear case causing severe damage.
If the gear oil has a milky color, it is contaminated with water. Immediately contact your authorized Suzuki marine dealer for advice. Do not operate your outboard until the oil is changed and the cause of the contamination is corrected.
Step 2: LOW PRESSURE FUEL FILTER
The low pressure fuel filter must be replaced by an authorized Suzuki Marine Dealer periodically.
Replace low pressure fuel filter at every 400 hours (2 years).
Gasoline is extremely flammable and toxic. It can cause a fire and can be hazardous to people and pets.
Always take the following precautions when servicing the fuel filter:
• Stop the motor before cleaning the fuel filter.
• Be careful not to spill fuel. If you do, wipe it up immediately.
• Do not smoke, and keep away from open flames and sparks.
Cleaning solvent is toxic and an irritant, and can cause injury to people and pets.
Keep solvent away from children and pets. Dispose of solvent properly when you are finished.
Inspect and clean the fuel filter as follows:
Turn the engine off and allow it to cool.
If equipped with Keyless Start System:
Make sure that the keyless start system is in OFF stage.
If not equipped with Keyless Start System:
Make sure that the ignition key is in the OFF position.
Remove the bolts (1) securing the resonator (2) in place.
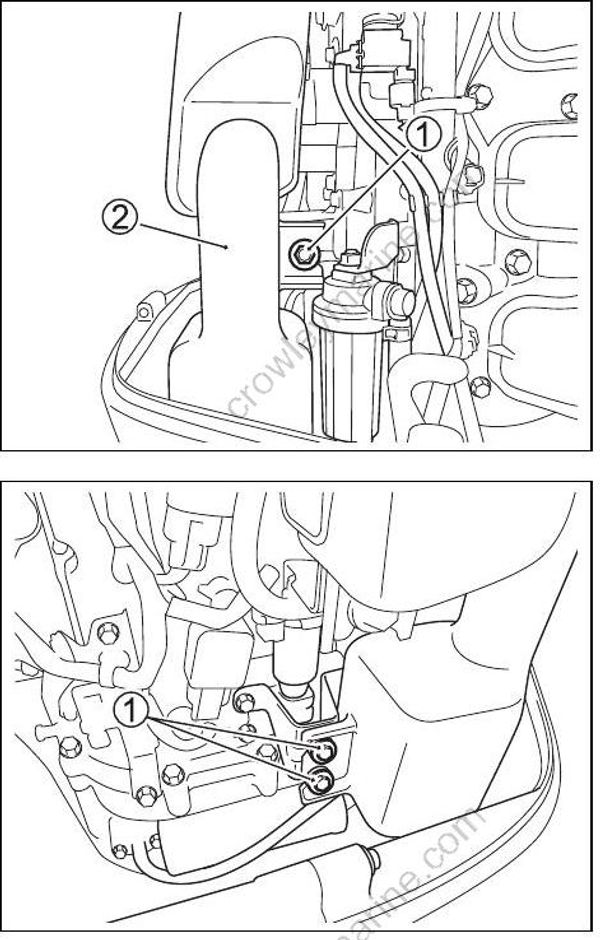
- Remove the resonator (2).
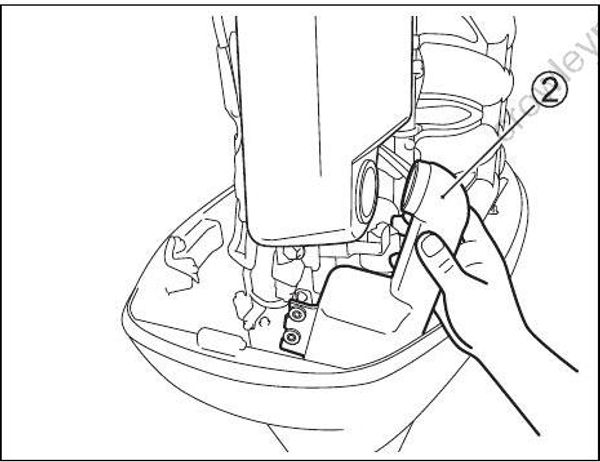
Improperly loosening the filter cup can cause sensor lead wire damage.
• Be careful not to twist the sensor lead wire when removing the filter cup.
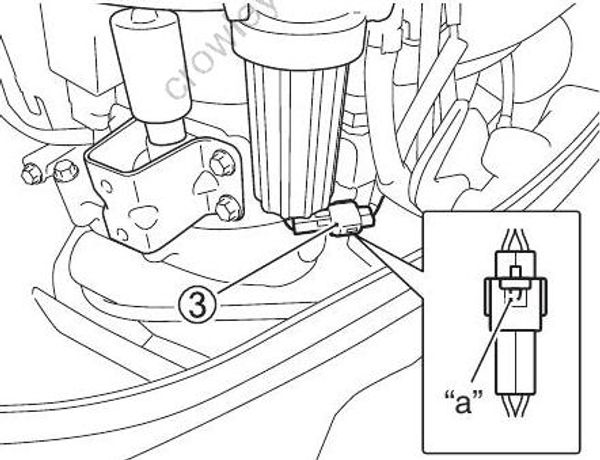
• Disconnect the lead wire connector before removing the filter cup.
- Push the connector lock tab “a”, then disconnect the water sensor lead wire connector (3).
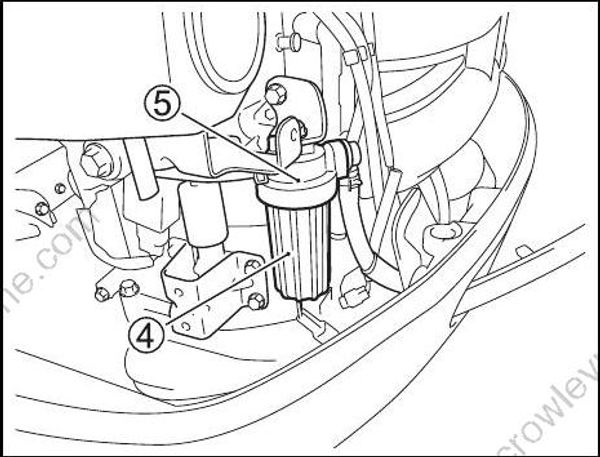
- Place a rag under the filter before removal to catch any spilled fuel.
- Separate the filter cup (4) from the cap (5) by turning the filter cup counterclockwise.
- Drain the fuel and water in the filter cup into a suitable container.
- Pull out the filter element (6). Inspect the filter element (6), O-ring (7) and seal ring (8) for damage. If they are damaged, replace them.
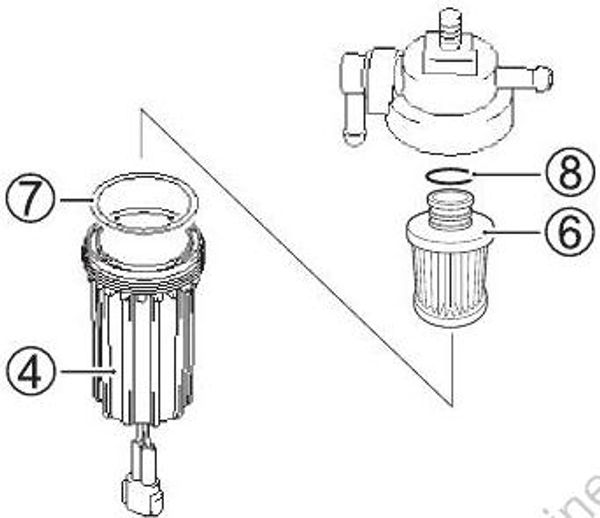
- Wash the filter element with clean solvent and dry it.
- Reinstall the seal ring and filter element in their original positions.
- Verify that the O-ring is in place in the top of the filter cup and screw the filter cup back into place.
- Connect the water sensor lead wire connector (3).
- Reinstall the resonator by securing the bolts.
- Restart the engine and check that there are no leaks around the fuel filter.
If any water exists in the fuel filter cup, remove the cup and drain the water. Always dispose of excess fuel safely. For questions, consult your authorized Suzuki marine dealer.