

Step 1: ADJUSTMENTS
TRIM ANGLE ADJUSTMENT
To help maintain steering stability and good performance, always maintain the proper trim angle as shown in the illustration. The appropriate trim angle varies depending on the combination of the boat, engine, and propeller, as well as operating conditions.
Make a test run in the boat to determine if the trim angle needs to be adjusted. Adjust the trim angle using the Power Trim and Tilt system.
Refer to the POWER TRIM AND TILT section.
If you still cannot achieve good performance, there may be a problem with engine mounting height. Consult your dealer for assistance.
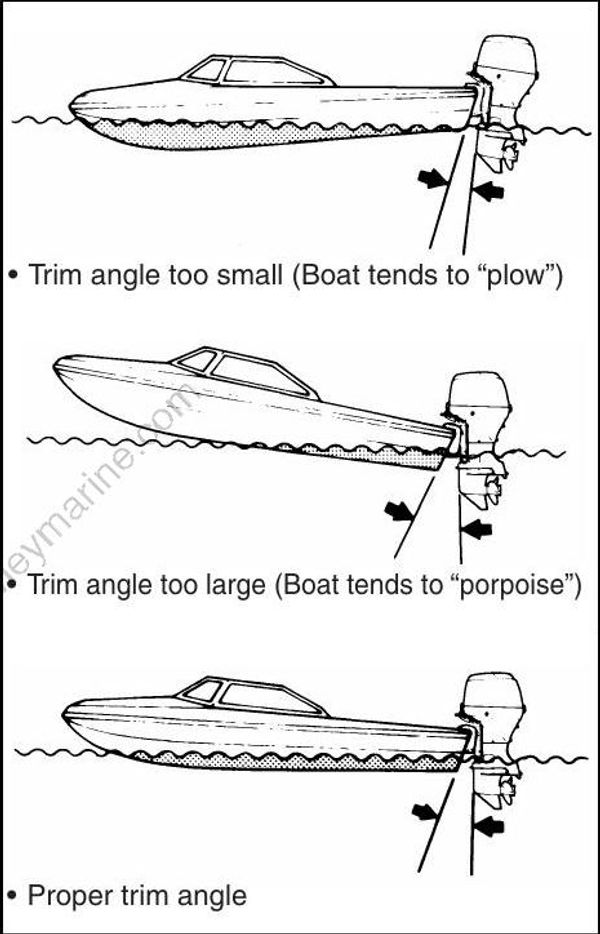

Trim angle greatly affects steering stability. If the trim angle is too small, the boat may “plow” or “bow steer”. If the trim angle is too large, the boat may “chine walk” from side to side or “porpoise” up and down. These conditions, which result in loss of steering control, can cause occupants to be thrown overboard.
Always maintain proper trim angle based on the combination of your boat, engine, and propeller, as well as operating conditions.
When the motor is tilted beyond the maximum trim position, the swivel bracket will not have side support from the clamp bracket and the tilt system will be unable to cushion the engine if the lower unit strikes an obstruction. This could lead to occupant injury.
Do not operate the engine above 1500 r/min or operate the boat in a planing attitude with the motor tilted beyond the maximum trim position.
If you operate the boat with the motor trimmed beyond the maximum trim position, the water intake holes may be above the water line, causing severe engine damage due to overheating.
Never operate the boat with the motor trimmed beyond the maximum trim position.
TRIM TAB ADJUSTMENT
This adjustment is used to compensate for the possible tendency of your boat to veer slightly to port or starboard. This tendency could be due to such things as propeller torque, motor mounting position, etc.
To adjust the trim tab:
- Loosen the bolt (A) that holds the trim tab in place.
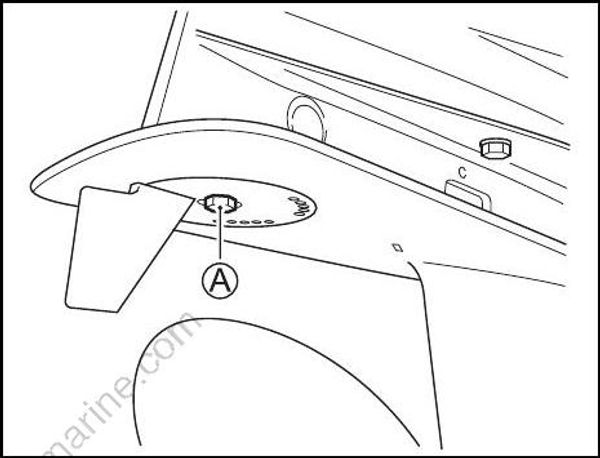
- If the boat tends to veer to port, move the rear end of the trim tab toward the port side. If the boat tends to veer to starboard, move the rear end of the trim tab toward the starboard side.
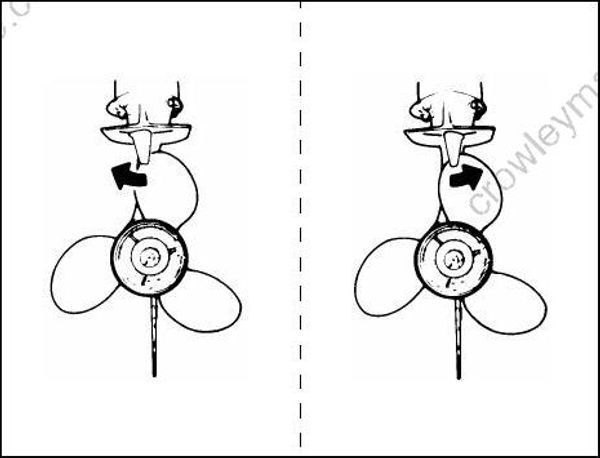
Tighten the bolt that holds the trim tab in place.
After adjusting the trim tab, check to see if the boat still tends to veer to one side. If necessary, readjust the trim tab.
THROTTLE TENSION ADJUSTMENT
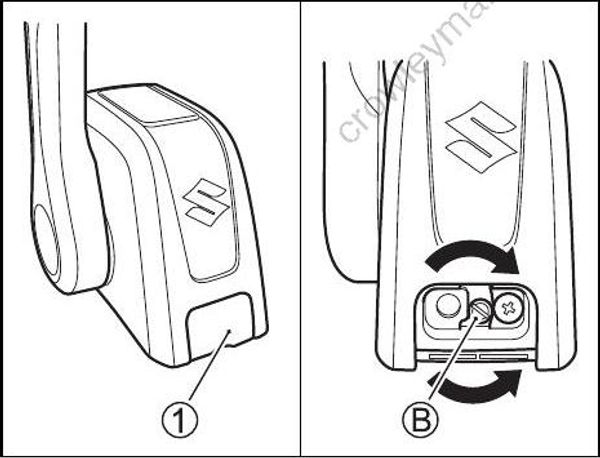
The tension of the remote control handle can be adjusted according to your preference. To increase the tension, turn the adjuster (A) clockwise. To decrease the tension, turn the adjuster counterclockwise.
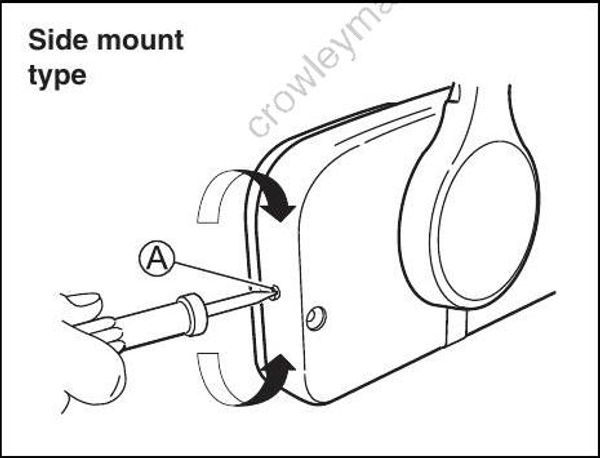
Top mount type
1. Remove the cover (1).
2. To increase the tension, turn the adjuster (B) clockwise. To decrease the tension, turn the adjuster (B) counterclockwise.
IDLE SPEED ADJUSTMENT
The idle speed has been factory adjusted between 600 – 700 r/min. in neutral.
If idle speed cannot be set within the specified range, contact your authorized Suzuki Marine Dealer.
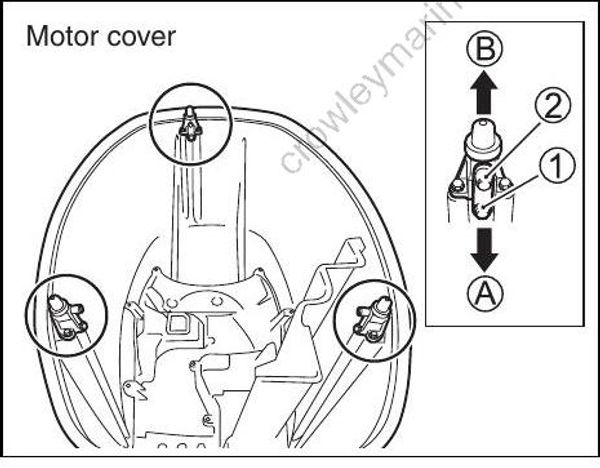
MOTOR COVER FASTENING
ADJUSTMENT
If you feel motor cover fastening is loose or too tight when locking the levers, adjust as follows:
- Loosen the bolts (1).
- Adjust the position of brackets (2). To increase the fastening, move the brackets to the direction (A). To decrease the fastening, move the brackets to the direction (B).
- Tighten the bolts.
Step 2: CAUTION SYSTEM
The caution systems are designed to alert you to certain situations which may cause damage to your outboard motor.
Your outboard motor may become damaged if you rely on the Caution System to alert you to any malfunction that may occur or to give you an indication of the need for maintenance.
To avoid damage to your outboard motor, regularly inspect and maintain it.
Continuing to operate your outboard motor with the Caution System activated can result in severe damage to your outboard motor.
If the Caution System activates while you are operating your outboard motor, stop the motor as soon as possible and correct the problem or consult your authorized Suzuki marine dealer for assistance.
INDICATOR CHECK
If equipped with Keyless Start System:
Each time when the Keyless Start System is turned to ON state by turning the main switch to the “ON & OFF” position and then turning it back to the “PUSH START/STOP” position, four lamps – the REV LIMIT (1), the OIL (2), the TEMP (3) and the CHECK ENGINE (4) in the monitor-tachometer will light and the buzzer will also sound for the first two seconds.