

OIL FILL AND AIR BLEEDING
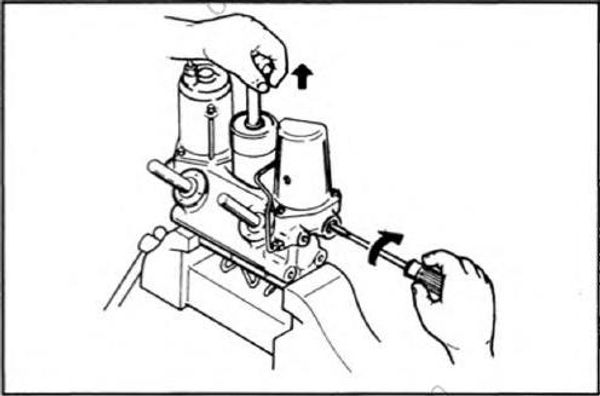
1. Place the trim and tilt pistons at the top position.
- Open the manual valve and pull up the tilt piston.
- Close the manual valve, push down the tilt piston, and pull up the trim piston.
NOTE:
Push in the tilt piston a little, and the trim piston will come out. Pull it all the way out.
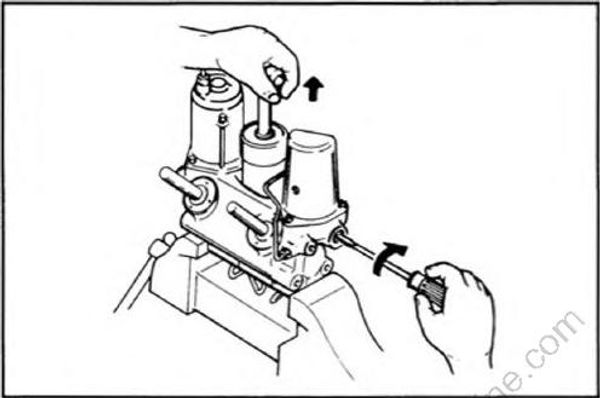
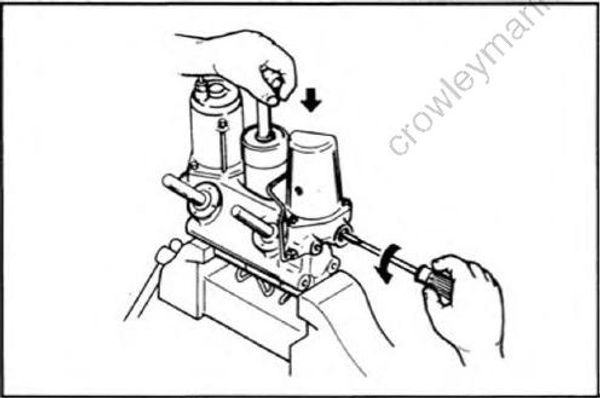
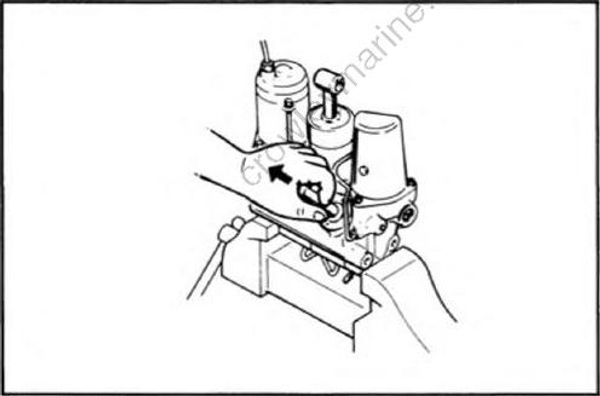
- Open the manual valve, pull up the tilt piston, and close the manual valve.
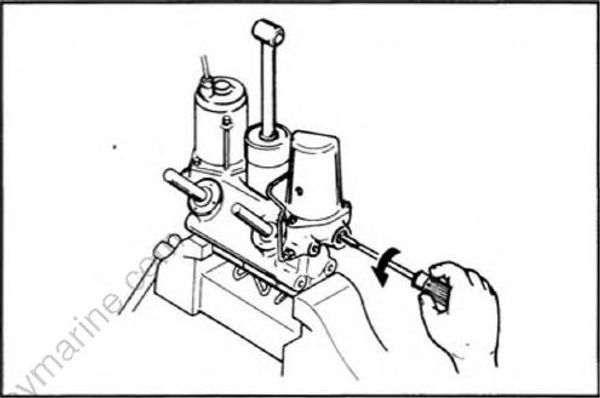
2. Fill the pump chamber with oil (with the manual valve kept closed)
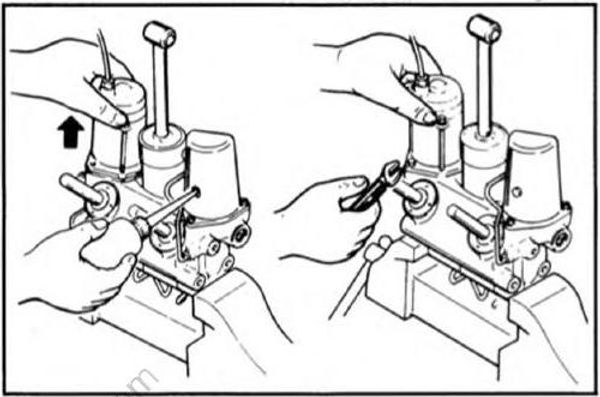
- Loosen the motor mounting bolts and slightly lift the motor off the trim and tilt housing. (The oil reservoir filler is kept open.)
NOTE:
Take care so that the gear pump connector shaft does not fall off.
Lift the motor so that air can be bled from the gear pump chamber.
When oil starts overflowing past the contact surface of the trim and tilt housing and the motor, tighten the motor mounting bolts.
Motor mounting bolt tightening torque: 6 Nm (0.6 m«kg, 4.3 ft«lb)
NOTE:
Make sure the motor shaft aligns with the gear pump connector shaft.
3. Let oil flow into the trim cylinder upper chamber.
- Open the manual valve, and while adding oil into the reservoir oil filler, push down the trim piston on the pump chamber side.
- With the manual valve opened, add oil into the reservoir oil filler and push down the trim piston on the reservoir side.
NOTE:
The trim rod on the pump chamber side may move up. Simply push it down.
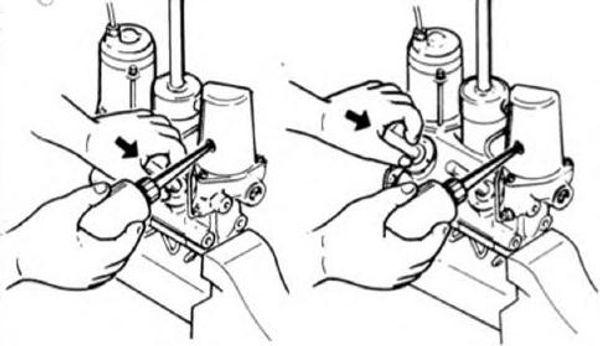
4. Let oil flow to the tilt cylinder upper chamber.
- Turn the manual valve toward the manual tilt until tight and turn the manual release screw 1.5 turns toward the power tilt. While adding oil through the reservoir filler, push down the tilt rod.
NOTE:
Both trim rods may move up but this is no problem.
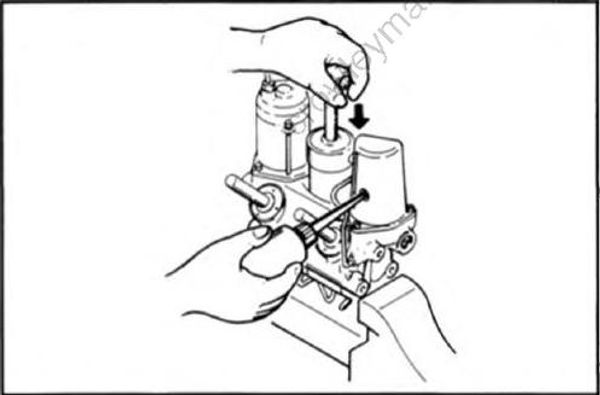
5. Completely open the manual valve, and while adding oil, push down both trim rods.
NOTE:
- If the tilt rod moves up, push it down.
- Add oil until oil overflows through the reservoir filler.
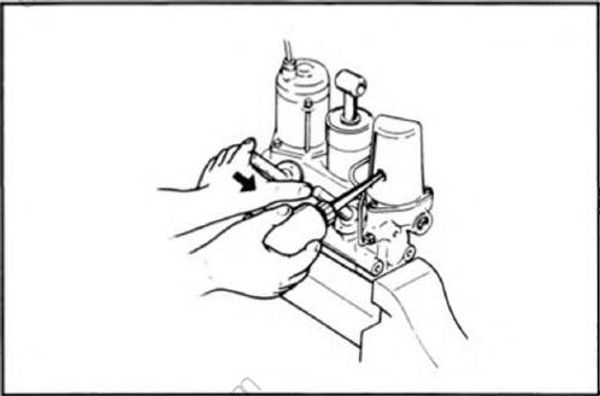
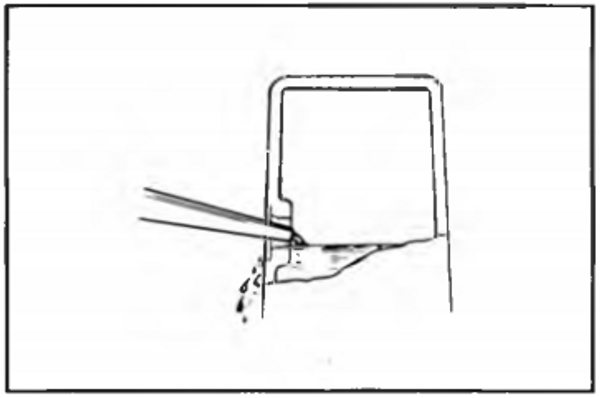
6. By turning the motor, perform trim and tilt (Keep the reservoir filler plug tightened).
Turn the manual valve toward the power tilt until tight.
NOTE:
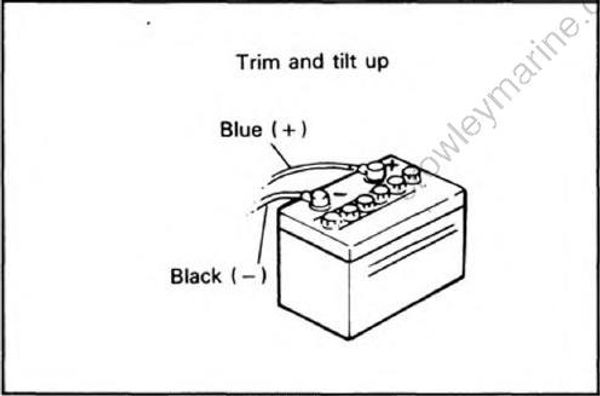
The motor leads should be connected as shown below.
- Trim and tilt up.................. Blue (+), Black (-)
- Trim and tilt down................ Green ( + ), Black (-)
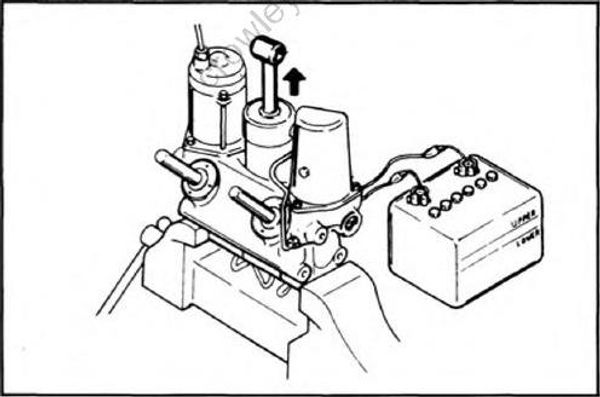
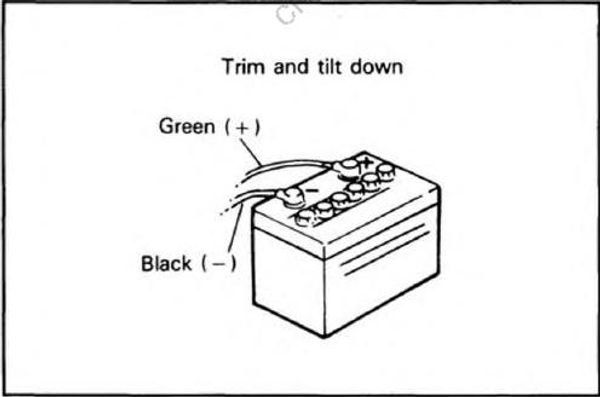
7. Check the oil level
- Turn the manual valve toward the manual tilt until tight.
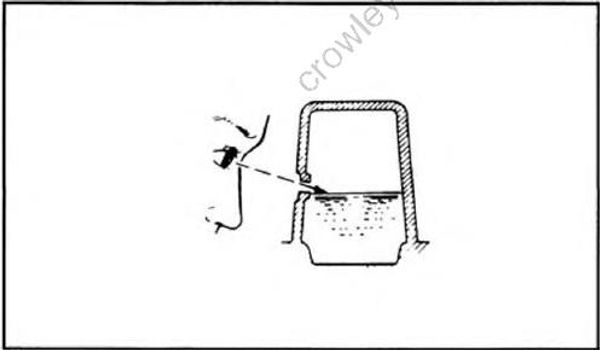
- Remove the reservoir filler plug and check the oil level.
NOTE:
When checking the oil level, be sure to turn the manual valve first toward the manual tilt until it stops and then remove the reservoir filler plug.
8. Check the air cushion
With the tilt rod at the top position, check for air cushion by pushing down the tilt rod.
NOTE:
In this case, repeat the operations in 4 to 7 above.
9. Drive the motor and repeat the tilt up and down and trim up and down 2 or 3 times to check operation and oil leakage.
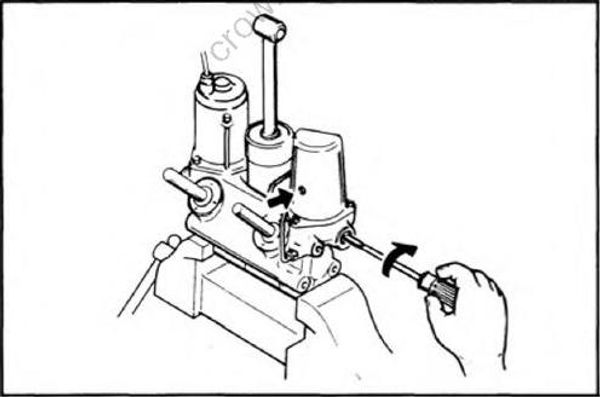
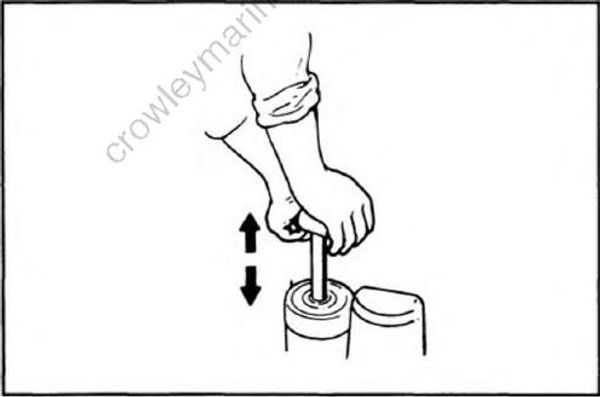
Hydraulic oil pressure test
Drive the motor to check trim and tilt up and down operation and oil leakage. Next, check the trim and tilt cylinder oil pressures.
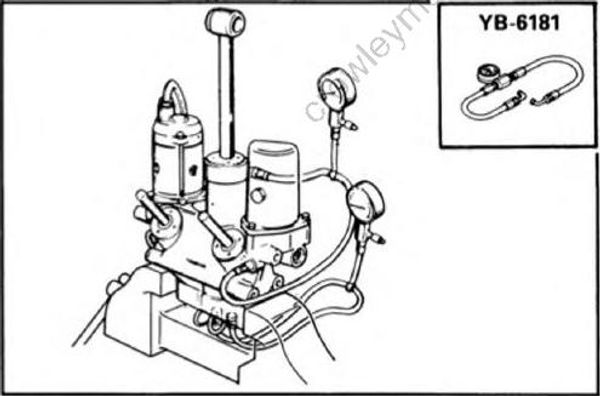
1. Setting the oil pressure gauge
- Set the manual valve to the manual tilt position.
NOTE:
Turn the manual valve toward the manual tilt until it stops.
- Connect the pressure gauge hoses to the trim cylinder lower chamber and tilt cylinder lower chamber or to the reservoir bottom and tilt cylinder upper chamber.
NOTE:
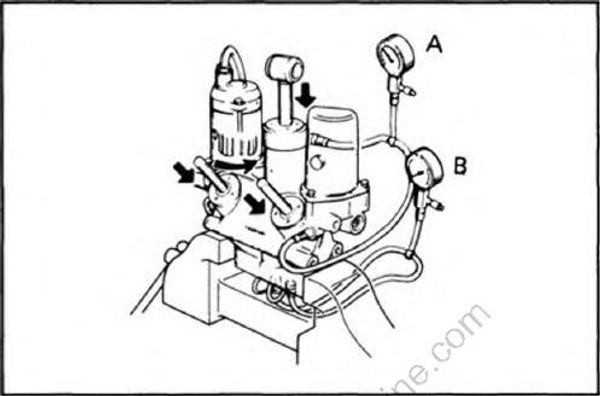
The illustration below shows that the pressure gauge hoses are connected to measure both trim and tilt pressures at the same time. But only a set of hoses is available so that both of the trim and tilt pressures cannot be measured at the same time.
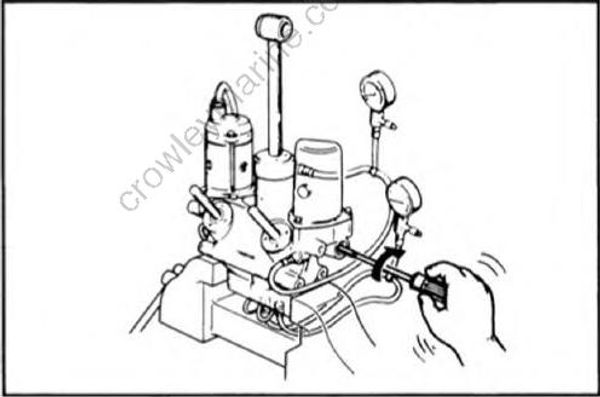
2. Air bleeding
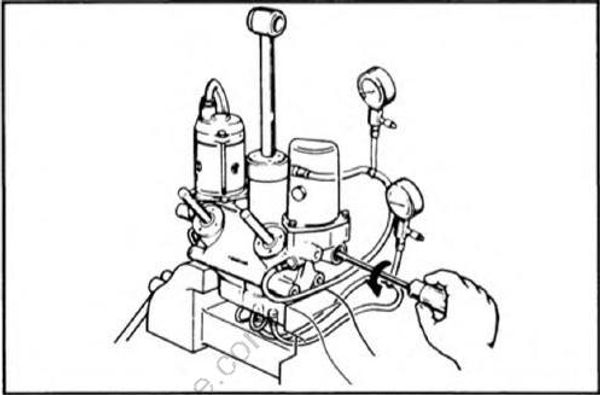
- Set the manual valve to the power tilt side.
NOTE:
Turn the manual valve toward the power trim side until it stops.
- By driving the motor, perform trim and tilt operation.
NOTE:
The motor should be operated within three seconds after trim and tilt up operation.
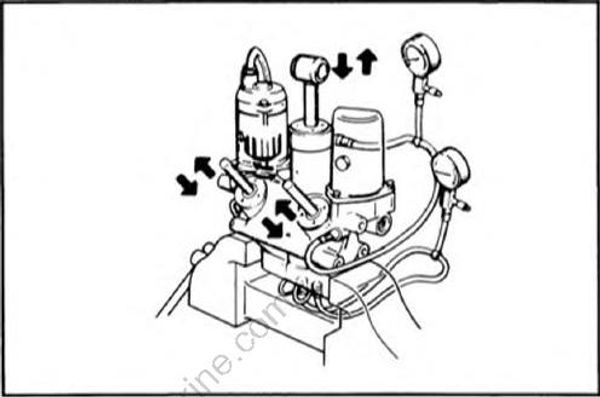
- After each up and down operation, turn the manual valve toward the manual tilt and perform air bleeding.
NOTE:
After setting the manual valve on the manual tilt side, be sure to set it back to the power tilt side and check the following operation.
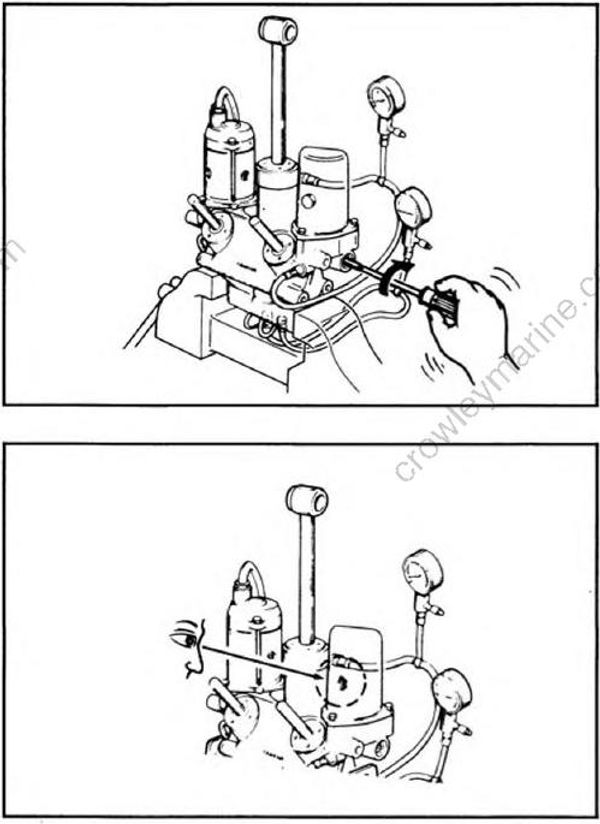
- At the end of up-operation, check the oil level. If the oil level is low, add oil.
NOTE:
To check the oil level, turn the manual valve toward the power trim side until it stops.
- Repeat the operations in 1~4 above and perform air bleeding.
3. Checking the oil discharge pressure during up operation
Perform trim and tilt operation and measure the oil discharge pressure.
NOTE:
The motor should be operated within three seconds after trim and tilt up-operation.
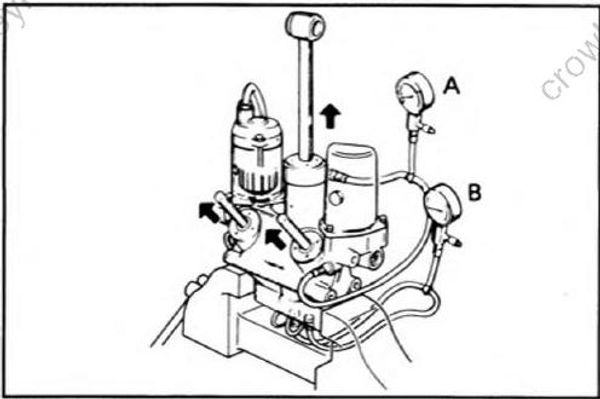
A: Tilt operating pressure gauge
B: Trim operating pressure gauge
Pressures measured
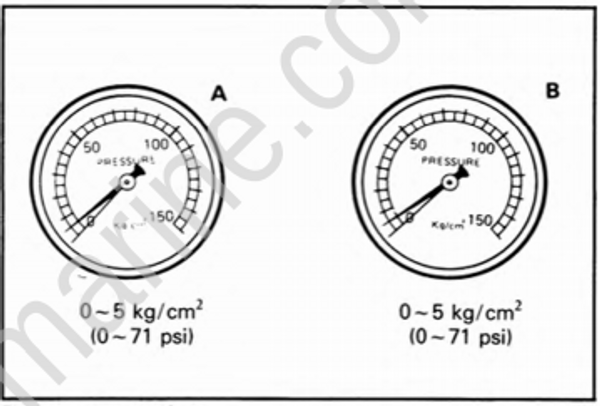
During up operation
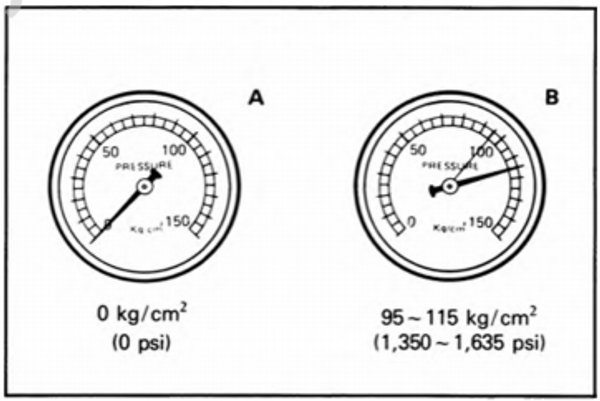
At the end of up-operation
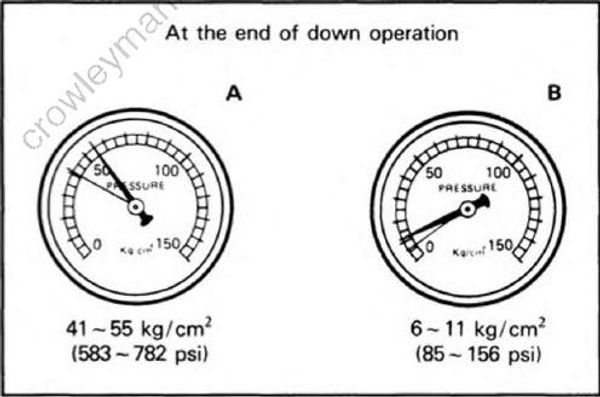
4. Checking the oil discharge pressure during down-operation
Perform trim and tilt down-operation and measure the oil pressure.
NOTE:
The motor should be operated within three seconds after trim and tilt down-operation.
Pressures measured
5. Removing the oil pressure gauge
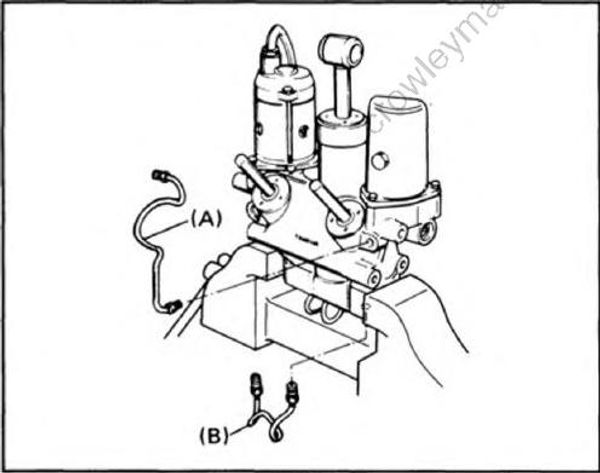
Remove the oil pressure gauge and install pipe 3 (A) and pipe 2 (B).
NOTE:
When the oil pressure gauge has been remov ed, be sure to turn the manual valve toward the power trim side until it stops.
Perform air bleeding according to the procedure specified in 2 above.
GEAR CASE DISASSEMBLY
Preparation for disassembly
Remove the gear case from the upper casing.
See page 5-2 for removal.
To disassemble the gear case, hold it with a repair stand. If no repair stand is available, grip the skeg in a vise. To protect the skeg against damage, wrap it with a rag.
Gear oil drain
Remove the oil drain plug and oil level plug and drain the gear oil.
NOTE:
Be sure to remove the drain plug first.
Let the gear oil drain into a tray so that it will not spill on the floor.
Should any gear oil spill on the floor, wipe it off immediately with rags.
When draining the gear oil, place the engine in a tilt-up posiiton.
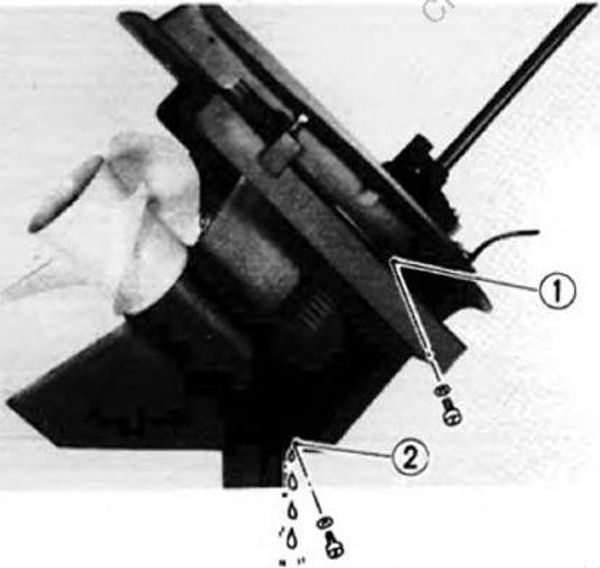
- Oil level plug
- Oil drain plug
NOTE:
After draining the oil, adjust the repair stand so that the gear case is in a horizontal position.