

PREPARATION FOR REMOVAL
| A | 4 Nm (0.4 m * kg. 2.9 ft * lb) |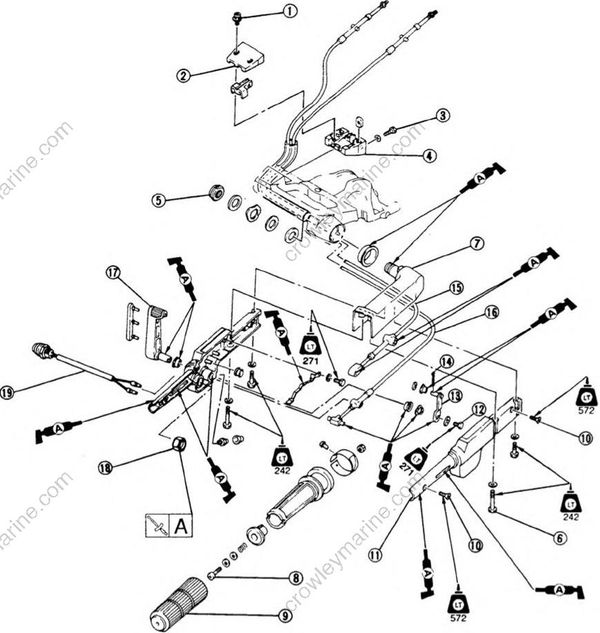
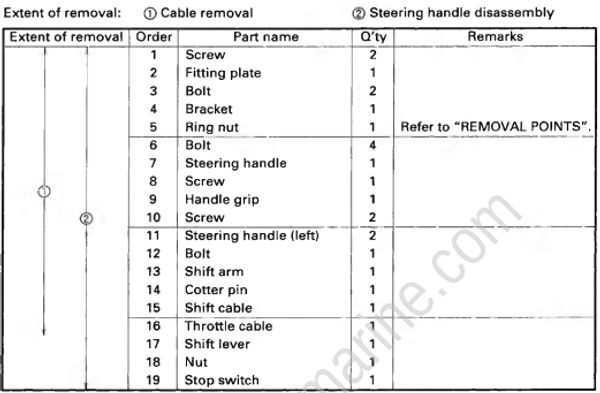
(T9.9/FT9.9A F8B, F9.9/F9.9B for Europe and Canada)
- Disconnect the control cables at engine side.
- Disconnect the wire leads.
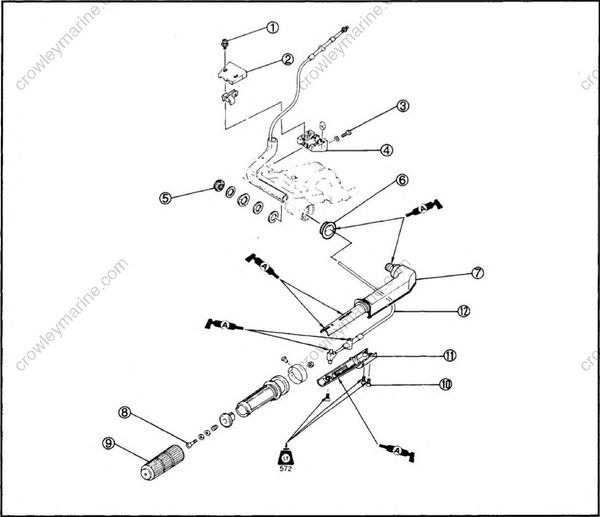
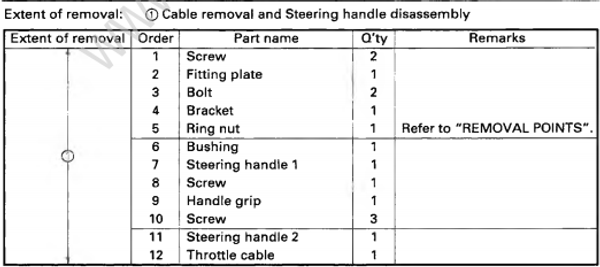
PREPARATION FOR REMOVAL (F9.9/F9.9B except for Europe and Canada)
- Disconnect the control cables at engine side
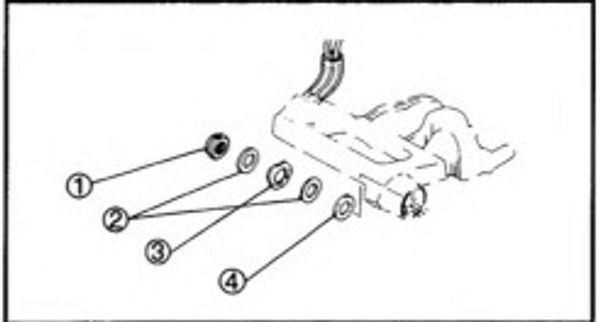
REMOVAL POINTS
RING NUT
- Remove:
- (1) Ring nut
- (2) Washer
- (3) Washer (wave)
- (4) Washer (nylon)
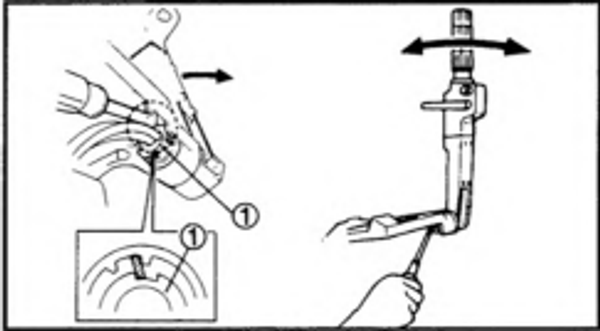
NOTE:
Turn the steering handle backward.
Fit a standard-head screwdriver into the slit in the ring nut.
Set the screwdriver using the steering bracket as a fulcrum.
Turn steering handle forward and loosen the ring nut.
Repeat this operation until the ring nut comes off.
INSPECTION SHIFT AND THROTTLE CABLES
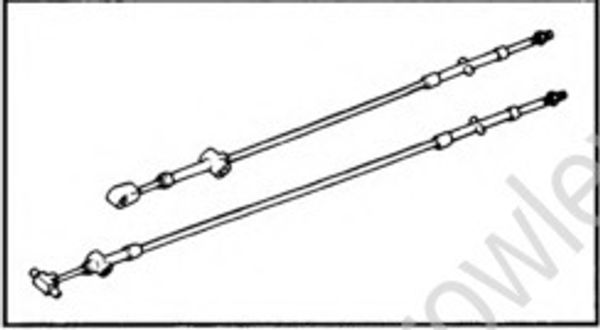
- Inspect:
- Shift cable
- Throttle cable
Bend/Damage -» Replace.
Unsmooth operation -» Replace.
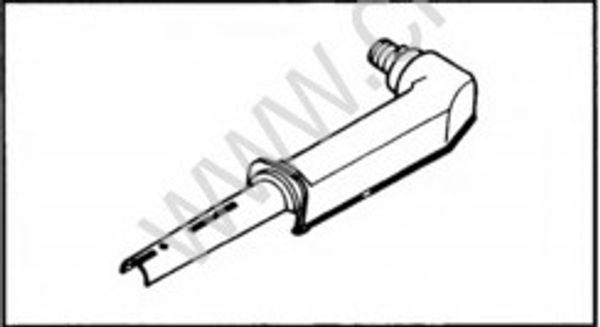
STEERING HANDLE
- Inspect:
- Steering handle
Crack/Damage -> Replace.
ASSEMBLY AND INSTALLATION
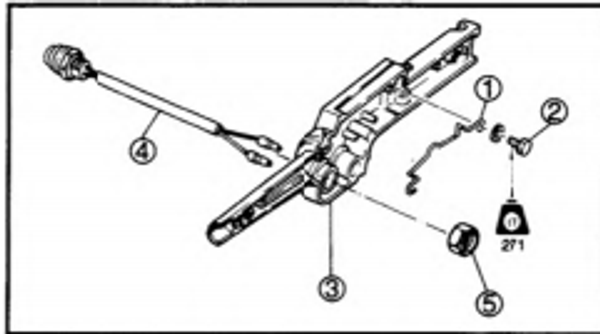
(T9.9/FT9.9A, F8B,F9.9/F9.9B for Europe and Canada)
- Install:
- (1)Spring
- (2)Bolt
- (3)Steering handle (right)
- (4)Stop switch
- (5)Nut
Nut: 4 Nm (0.4 m • kg, 2.9 ft • lb)
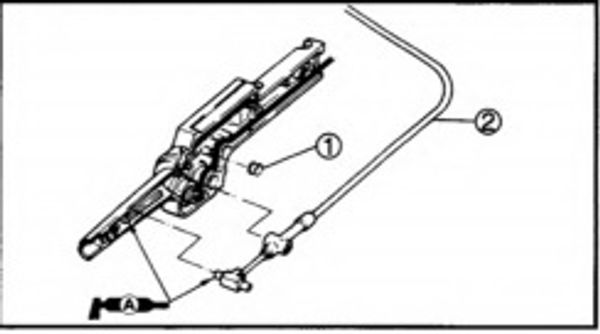
- Install:
- (1)Grommet
- (2)Throttle cable
NOTE:
Fit the inner cable end in the groove, and fit the outer cable end into the hole.
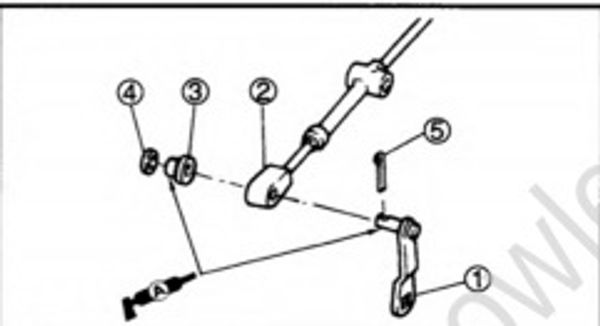
- Install:
- (1)Shift arm
- (2)Shift cable
- (3)Collar
- (4)Washer
- (5)Cotter pin
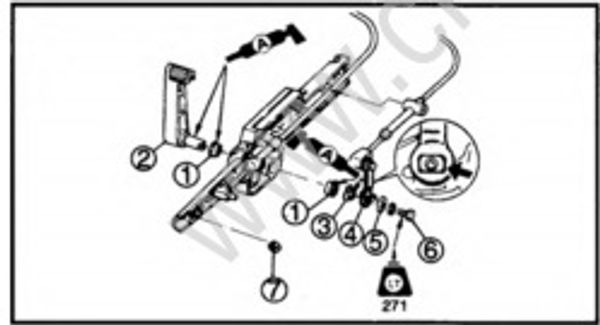
- Install:
- (1)Bushing
- (2)Shift lever
- (3)Wave washer
- (4)Shift arm
- (5)Washer
- (6)Bolt
- (7)Nut
NOTE:
- Align the shift lever shaft end with the hole in the shift arm.
- Fit the shift arm collar to the Neutral position of the spring.
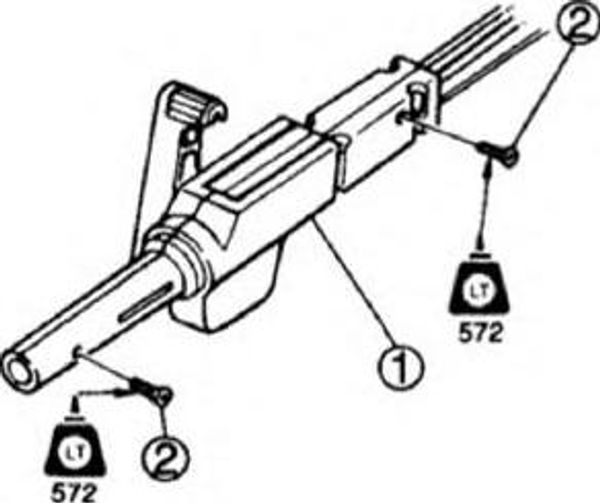
- Install:
- (1)Steering handle (left)
- (2)Screw
NOTE:
- When installing steering handle, fit the throttle and shift cables correctly in place.
- After installing the steering handle, make sure that the shift lever operates correctly.
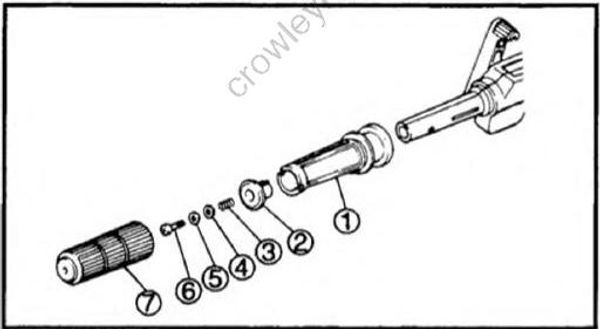
- Install:
- (1)Steering grip
- (2)Friction piece
- (3)Spring
- (4)Washer
- (5)Washer (nylon)
- (6)Screw
- (7)Handle grip
NOTE:
Fit the handle grip correctly
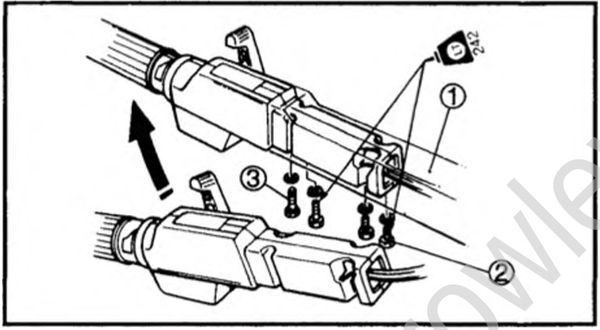
- Install:
- (1)Steering handle
- (2)Bolt (short)
- (3)Bolt (long)
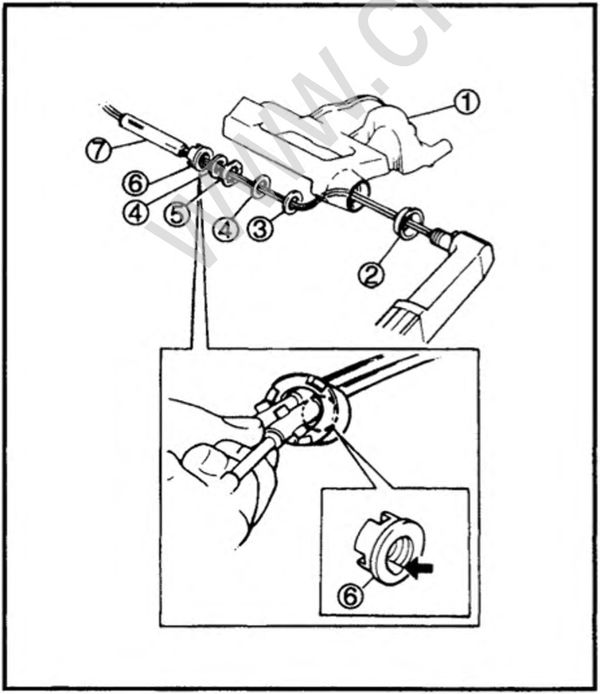
- Install:
- (1)Steering bracket
- (2)Bushing
- (3)Washer (nylon)
- (4)Washer
- (5)Wave washer
- (6)Ring nut
- (7)Tube
NOTE:
Pass the throttle and shift cables and stop switch leads through the steering handle on the steering bracket.
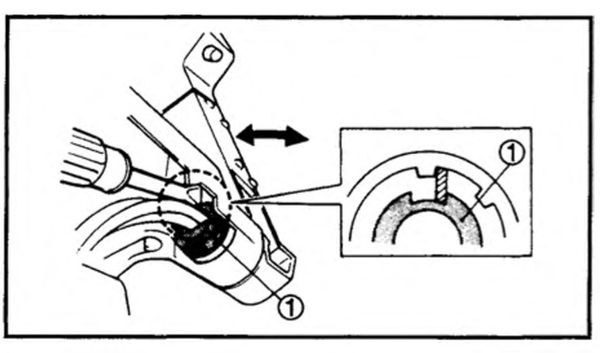
- Tighten:
- (1)Ring nut
NOTE:
Screw in the ring nut by hand until tight and fit a slotted-head screwdriver into the slit in the ring nut.Lock the screwdriver with the steering bracket and tighten the ring nut by moving the steering handle back and forth.
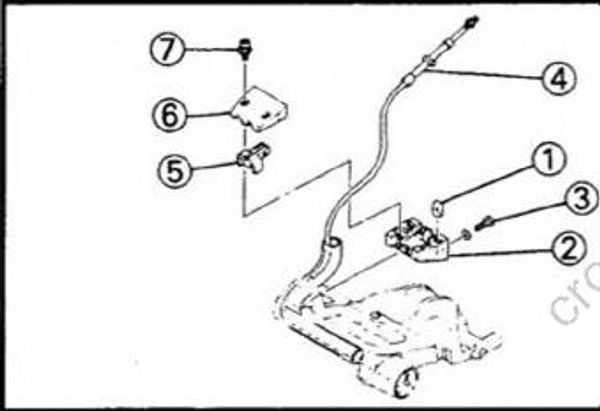
- Install:
- (1)Nut
- (2)Bracket
- (3)Bolt
- (4)Shift cable
- (5)Throttle cable
- (6)Stopper bracket
- (7)Fitting plate
- (8)Screw
NOTE:
When installing the shift cable, set the shift lever in the forward position.
- Adjust:
Throttle cable length
Refer to page 3-15.
STEERING HANDLE
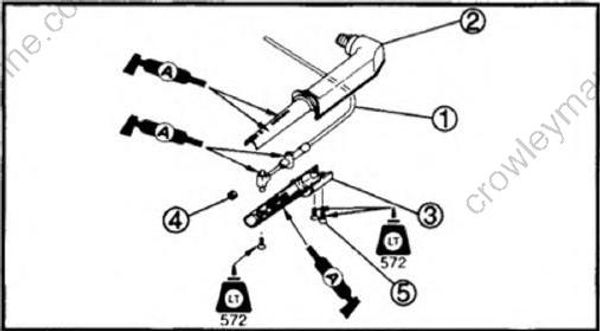
(F9.9/F9.9B except for Europe and Canada)
- Install:
- (1)Throttle cable
- (2)Steering handle (upper)
- (3)Steering handle (under)
- (4) Nut
- (5) Screw
NOTE:
Fit the inner cable end in the groove and fit the outer cable end into the hole.
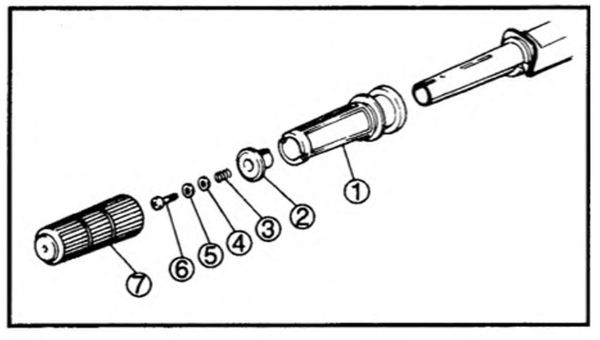
- Install:
- (1) Steering grip
- (2) Friction piece
- (3) Spring
- (4) Washer
- (5) Washer (nylon)
- (6) Screw
- (7) Handle grip
NOTE:
Fit the handle grip correctly.
- Install:
- (1) Steering bracket
- (2) Bushing
- (3) Washer (nylon)
- (4) Washer
- (5) Wave washer
- (6) Ring nut
- (7) Tube
NOTE:
Pass the throttle cable through the steering handle on the steering bracket.
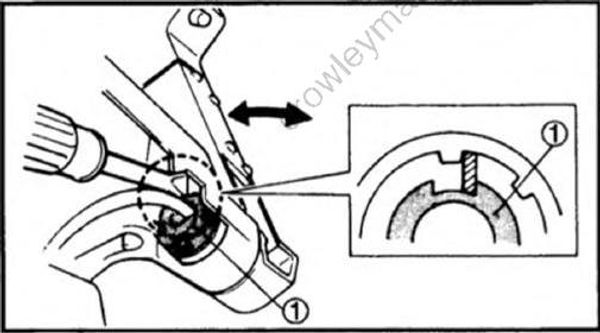
- Tighten:
- (1) Ring nut
NOTE:
Screw in the ring nut by hand until tight and fit a slotted-head screwdriver into the slit in the ring nut.Lock the screwdriver with the steering bracket and tighten the ring nut by moving the steering handle back and forth.
- Install:
- (1) Nut
- (2) Bracket
- (3) Bolt
- (4) Throttle cable
- (5) Stopper bracket
- (6) Fitting plate
- (7) Screw
- Adjust:
Throttle cable length
Refer to page 3-15