

Bracket unit
- Install the tilt piston assembly into the tilt cylinder, and then tighten the tilt cylinder end screw (1) to the specified torque.
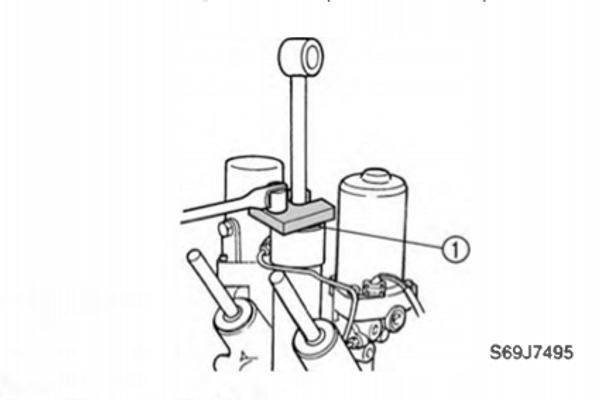
To prevent the power trim and tilt fluid from spurting out due to internal pressure, the tilt ram should be kept at full length.
Place the tilt cylinder end screw at the bottom of the tilt ram and install the tilt piston assembly into the tilt cylinder.
Trim and tilt cylinder wrench: YB-06175-2B
Tilt cylinder end screw: 90 N-m (9.0 kgf-m, 66.4 ft-lb)
Bleeding the power trim and tilt unit
Not installed
- Tighten the manual valve (1) by turning it clockwise.
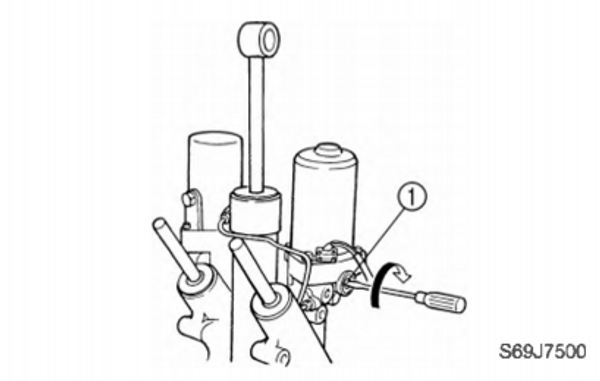
Place the power trim and tilt unit in an upright position.
Check the fluid level in the reservoir.
The fluid level should be at the brim of the filler hole.
- If necessary, add sufficient fluid of the recommended type to the correct level.
Recommended power trim and tilt fluid: ATF Dexron II
Install the reservoir cap.
Connect the PTT motor leads (2) to the battery terminals.
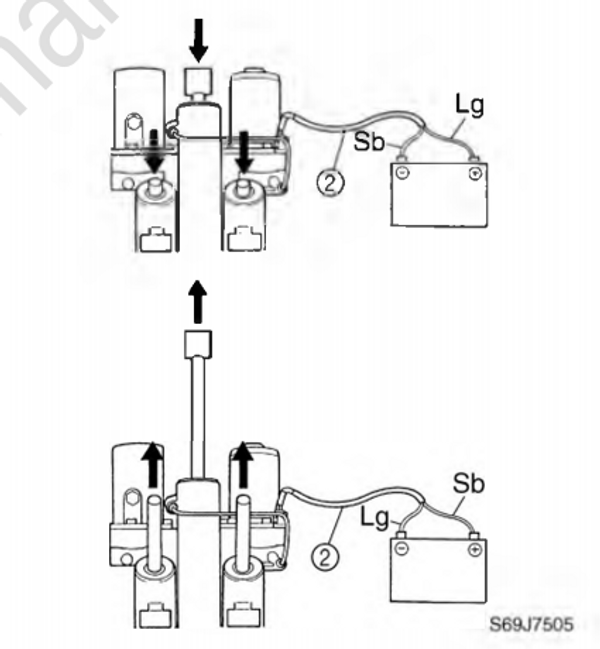
| Ram | PTT motor lead | Battery terminal |
|---|---|---|
| Up | Sky blue (Sb) | (+) |
| Light green (Lg) | (-) | |
| Down | Light green (Lg) | (+) |
| Sky blue (Sb) | (-) |
- Reverse the PTT motor leads between the battery terminals to fully extend the tilt ram and trim rams, and then reverse them again to fully retract the rams.
Repeat this procedure so that the rams go up and down four to five times
(be sure to wait a few seconds before switching the leads).The sound of the power trim and tilt motor will change when the rams are fully extended.
If the rams do not move up and down easily, push and pull on the rams to assist operation.
- Check the fluid level again when the rams are fully extended. Add sufficient fluid, if necessary, and then repeat step 7.
Repeat this procedure until the fluid remains at the correct level.
Built-in
- Loosen the manual valve by turning it counterclockwise until it cannot be turned further.
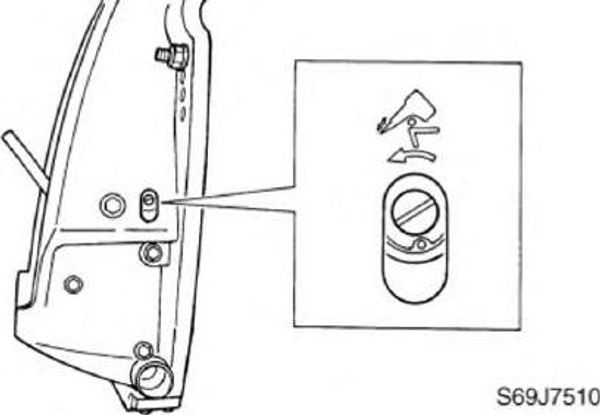
Fully tilt the outboard motor up, and then release it and let it lower by its own weight four to five times.
Tighten the manual valve by turning it clockwise.
Let the fluid settle for 5 minutes.
Push and hold the power trim and tilt switch in the up position until the out board motor is fully tilted up.
Support the outboard motor with the tilt stop lever, and then let the fluid settle for 5 minutes.
After tilting up the outboard motor, be sure to support it with the tilt stop lever. Otherwise, the outboard motor could suddenly lower if the power trim and tilt unit should lose fluid pressure.
Remove the reservoir cap (1), and then check the fluid level in the reservoir.
If necessary, add sufficient fluid of the recommended type to the correct level.
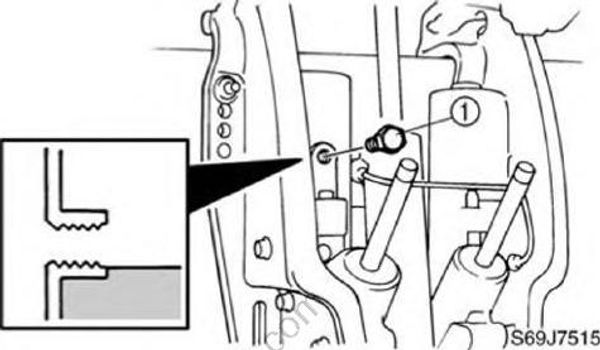
If the fluid is at the correct level, the fluid should overflow out of the filler hole when the cap is removed.
Recommended power trim and tilt fluid: ATF Dexron II
- Install the reservoir cap.
Repeat this procedure until the fluid remains at the correct level.